Transducer Install Tips
January 17, 2023 6 min read


Garbage in, garbage out. The phrase was coined in the early days of computer programming to convey the idea that, since computers couldn’t think for themselves, no machine could produce good output based on bad input.
Arguably, that’s changing with the advent of artificial intelligence and machine learning, but it’s still true of our fishfinders. No matter how slick and intuitive their interfaces, how fast their processors or how big and bright their displays, the quality of their output is entirely dependent on the quality of their input — the raw data they receive from the transducer.
And that depends on both the performance characteristics of the transducer and the quality of the installation.
Contents
- 1. What to Know About a Transducer
- 1.1 Use a Mounting Plate
- 1.2 Tape Your Drill Bit
- 1.3 No Electric Drivers!
- 1.4 Chamfer and Seal Your Holes
- 1.5 Level Your Transducer with the Transom Waterline
- 1.6 If You Lose Bottom at Speed, Go Lower
- 1.7 Lower the Tail a Few Degrees is Necessary
- 2. Check for Interference
What to Know About a Transducer
There’s little debate that, for most fiberglass boats, through-hull transducers deliver the best results, especially at speed. They are located in clean water, well forward of the engines, and their location makes it easier to run cables separately from other cables and electronics that can cause interference.
That being said, there are several drawbacks to through-hull transducers. The transducers themselves are generally more expensive; installation requires a 1” to 3” hole in the hull bottom and is not a job for most DIYers; and models that extend below the hull bottom can be damaged by hitting floating debris, the bottom and even trailer bunks.
All things considered, a transom-mounted transducer is the best overall choice for most trailerable boats. They’re (relatively) affordable, easy to install, don’t require cutouts, and perform comparably to a through-hull transducer with equivalent specs at less-than-planing speeds. They’re also easy to remove and replace when you upgrade to a new unit.
The main shortcoming of transom-mounted transducers is spotty performance when on plane. Even the best transom-mount installations won’t hold bottom at speed as well as a through-hull. But with a careful installation and some experimentation, they can come very close.
Here are a few things to keep in mind beyond what your installation instructions will tell you:
Use a Mounting Plate
Getting a transom-mount transducer dialed in typically takes some fine-tuning. Most of the time, that fine tuning can be done without drilling new holes, but not always.
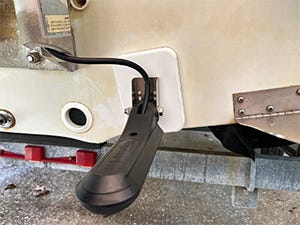
Regardless, it’s smart to use a mounting plate to minimize drilling into your transom. Screw-on Starboard plates and stick-on plates are commercially available, or you can make your own out of Starboard or expanded PVC.

Tape Your Drill Bit
When drilling holes in your transom — whether for the transducer itself or for a mounting plate — avoid going too deep by measuring the length of your screws minus the thickness of your mounting bracket and marking the necessary depth on your drill bit with a wrap of painter’s tape.


No Electric Drivers!
This really goes for every situation in which you’re tightening self-tapping screws into fiberglass, but it’s even more important below the waterline. Resist the urge to use your favorite electric drill or driver and instead tighten your screws by hand to avoid stripping.
Chamfer and Seal Your Holes
Drilling below the waterline always merits extra care. To avoid gelcoat cracking — which can let water penetrate between the gel and the fiberglass — try running your drill in reverse until the bit reaches the fiberglass. Then use a countersink to carefully chamfer the edges around the hole.
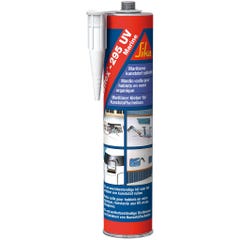
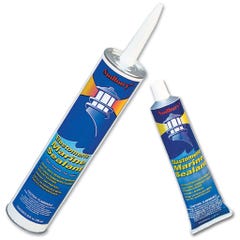
Seal the installation by coating screws and filling pilot holes with a quality marine sealant approved for below waterline use. 3M 5200, a high-strength polyurethane sealant, is frequently recommended, but its bonding properties are unneeded in this application and can make brackets very difficult to remove. Lower-strength polyurethanes like Sikaflex 295 UV and 3M 4200 and synthetic rubber formulations like Sudbury Elastomeric Marine Sealant are better choices. To prevent crevice corrosion, consider bedding your whole transducer bracket in sealant.
Level Your Transducer with the Transom Waterline
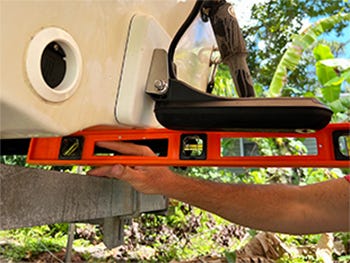
Most installation manuals emphasize the importance of getting the bottom of your transducer parallel with the bottom of your hull. On most boats, that’s fairly easy to do by simply holding a long straight edge against the bottom of your boat and matching the fore-aft angle of the transducer to that.
Use a horizontal guideline on your transom like the bottom edge of a jackplate and a framing square to make sure your side-imaging transducer is level side-to-side. This one needs to be rotated slightly clockwise.
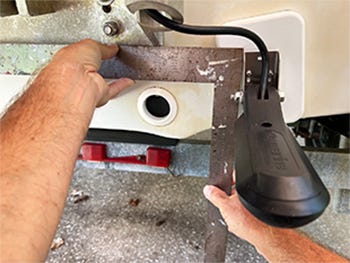

Somewhat more difficult — at least on V-bottom boats — is getting the transducer level with the waterline when viewed from the back. A few degrees one way or the other doesn’t make a big difference with down-looking sonar, but it can significantly affect performance with side imaging. The challenge is that you can’t use a level since you can’t assume your boat is sitting level on its trailer.
If your transom has a straight, horizontal line across it — a bottom paint line, a boot stripe, an aluminum transom cap, the bottom of a jackplate etc. — you can use that and a framing square or something similar to mark a vertical line and then line your transducer bracket up with that line. If there’s no obvious horizontal mark, you can use a string to mark a line across the transom from one chine to the other.
If You Lose Bottom at Speed, Go Lower
Most installation manuals recommend positioning the transducer so that its bottom surface is parallel with the hull bottom and either flush with the jull bottom or 1/8” below.
That’s good starting point, but most manuals don’t offer much advice about what to do if that doesn’t deliver the performance you’re looking for.
A good starting point for a transom-mount transducer is parallel with the hull bottom and 1/8” below it. Lower the “tail” end of the transducer a few degrees can improve performance at speed.
The answer is simple: move your transducer lower in 1/8” increments until it reads well at speed.

Why not just mount it lower in the first place? Because the lower your transducer is mounted, the more drag it produces and the more exposed it is to strikes from floating debris. When mounted too low, the “nose” of a transducer can even create turbulence of its own, hurting performance. If you’re getting a roostertail of white water from the nose of the transducer, it’s too low.
Lower the Tail a Few Degrees is Necessary
If lowering your transducer alone isn’t giving you the results you want, you can also try loosening the bracket bolts and lowering the “tail” end of the transducer a few degrees.
This obviously also adds drag and places the transducer more in harm’s way, but it can also result in a cleaner, more consistent stream of water across the bottom of the transducer. Be conservative here; lowering the tail too much will create lots of spray and put significant strain on the bracket.
Check for Interference
All installation manuals caution against routing transducer cables close to other cables and wiring. That’s not always possible though, especially on center consoles, where there’s often a single wiring chase from the stern to the console.
The fact is that transducer cables are shielded, and running them through the same chase with the rest of your wiring is usually not a problem for typical recreational use. That doesn’t mean it’s fine in every case — just that you don’t necessarily have to figure out how to route your transducer cable separately.
One way to be sure is to test your unit with the transducer cable loose on deck and away from potential interference. Then, after your route the cable, compare the performance. If you’re satisfied, finalize the installation. If not, then you can worry about how to route the cable differently to mitigate interference.


