Featured Project: Bass Boat Trailer Lights
February 28, 2023 4 min read

Over the past eight years, Luke Taylor had already replaced the lights on his bass boat trailer twice, both times with the same inexpensive incandescent lights it was originally equipped with. This spring, when they failed again, he decided to take a different approach, dropping a bit more money on a set of LED lights in higher quality housings. “I just got tired of changing them,” he says.
Bass Boat Trailer Light Replacement
The existing lights on Luke Taylor’s bass boat trailer were a wide, rectangular shape. The mounting area could accommodate a variety of shapes, though, and Taylor chose higher-quality LED replacement with a roughly square shape.
Although the existing lights were wide and rectangular, Taylor says he was more concerned with finding replacements of the quality he wanted than with matching the exact shape of the old lights. Also, the mounting surfaces on his trailer are relatively thin and easy to drill, meaning he didn’t even need to exactly match the old hole pattern.

(With heavier duty galvanized or aluminum trailers — which are generally made of thicker stock and harder to drill through — matching the hole pattern of existing lights is more important.)
Upgrading Trailer Lights and Wiring
The lights he chose came as part of a kit with a new wiring harness and 4-pin connector, and, although he had no reason to believe his existing wiring was bad, Taylor still decided to install the new harness as long as he was going to the trouble of changing the lights.
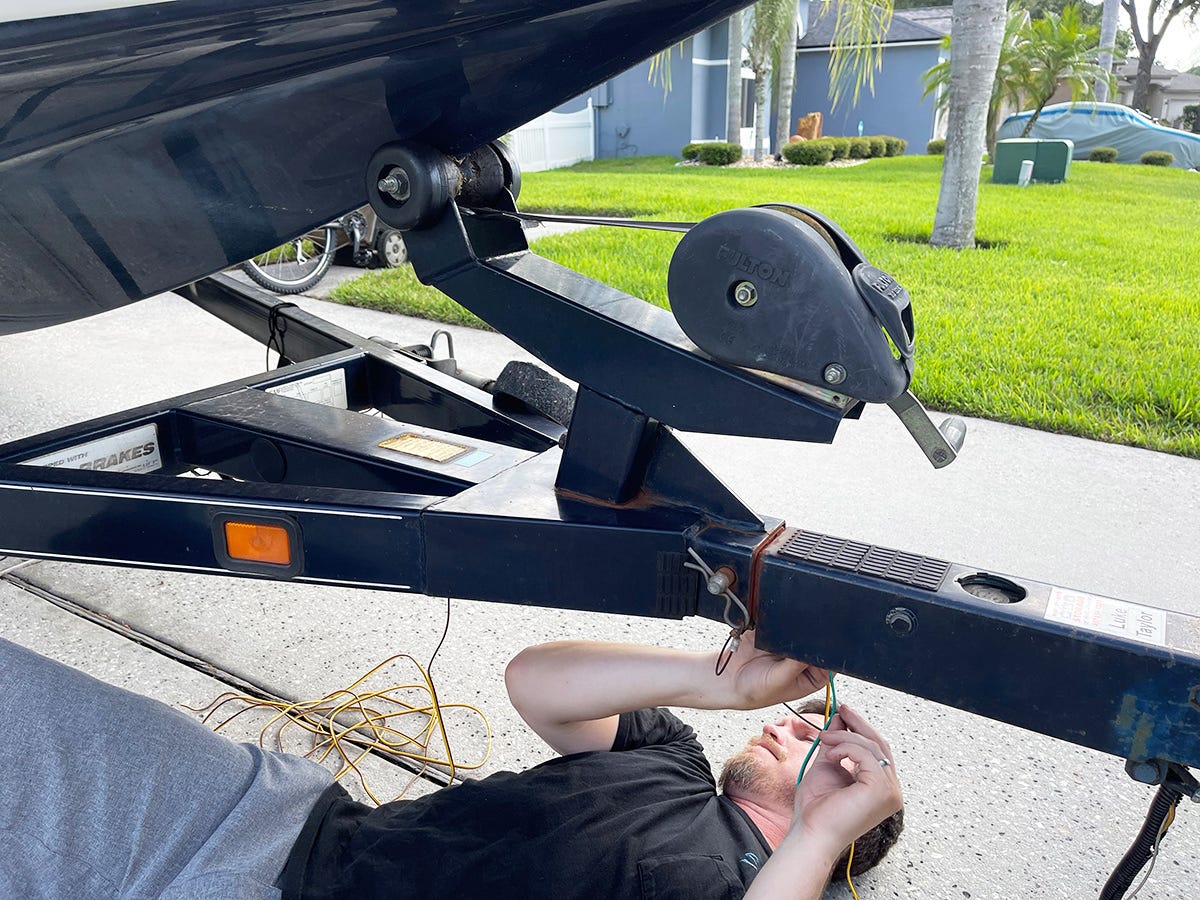
Because the trailer frame is made of rectangular tubing, that meant using the old wiring to pull the new wiring through the tubes. Pulling the wiring ended up being the hardest part of the project, Taylor says, since the runs were long with lots of snag points. (Note that replacing wiring harnesses is much easier on C-channel and I-beam trailers than on tube frame trailers.)
Replacing the Wiring Harness
Along with the lights, Taylor replaced the wiring harness. Using the old wires to pull the new wires through the trailer’s tubular frame, was the hardest part of the project
Once the new wiring had been run through the trailer frame, Taylor wrapped the wires where they exit the frame with electrical tape to protect them from chafing or abrasion. He also connected the ground wire from the connector to the existing ground on the trailer. Especially on painted trailers, getting a good clean ground can be a challenge, so it made sense to simply connect to the old one.
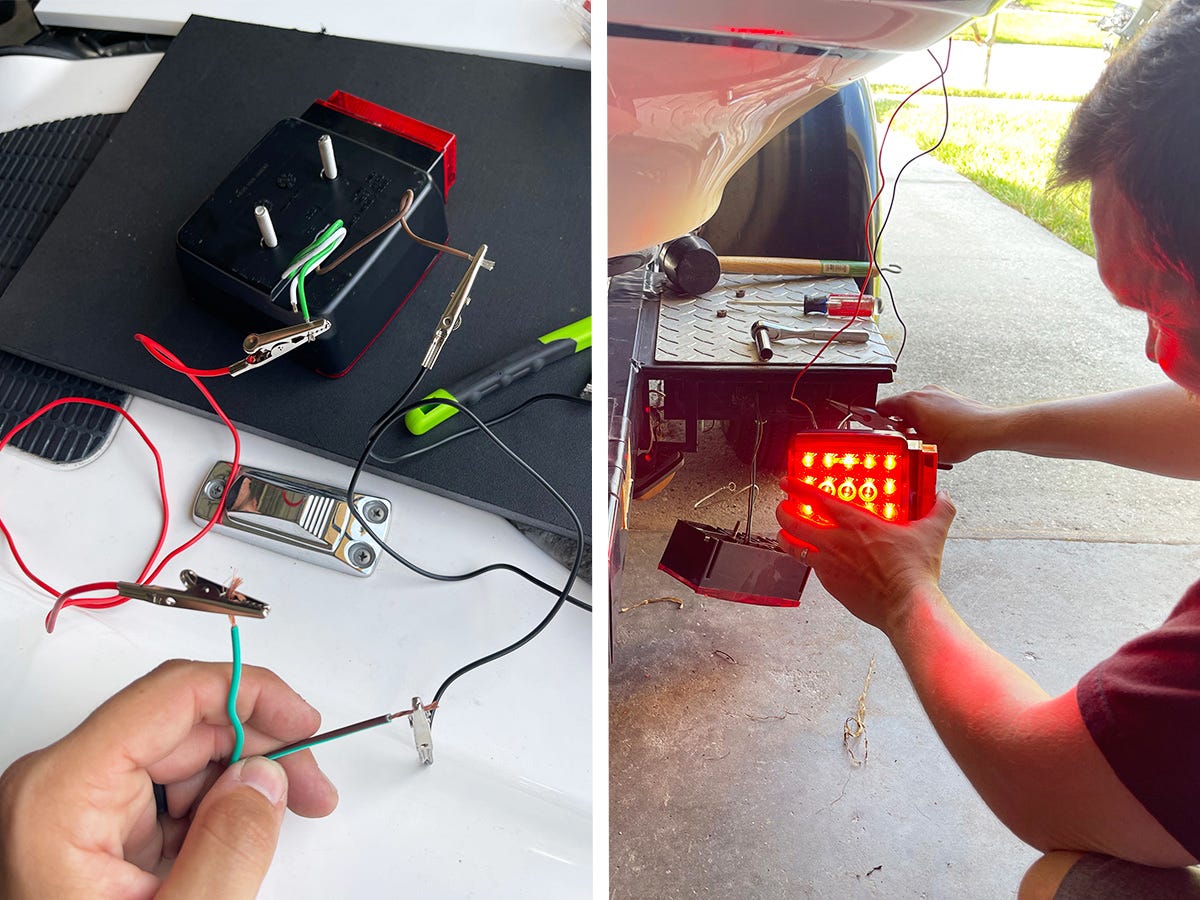
With the harness connected to the tow vehicle, it was time to test the new lights before bolting them in place and making final wiring connections. A set of simple jumpers with alligator clips made it easy to temporarily connect the new lights to the harness wires and test functions from the tow vehicle.
Prior to bolting the lights in place and making final wiring connections, Taylor plugged the harness into his tow vehicle and used jumpers with alligator clips to test light functions.
Installing the Lights
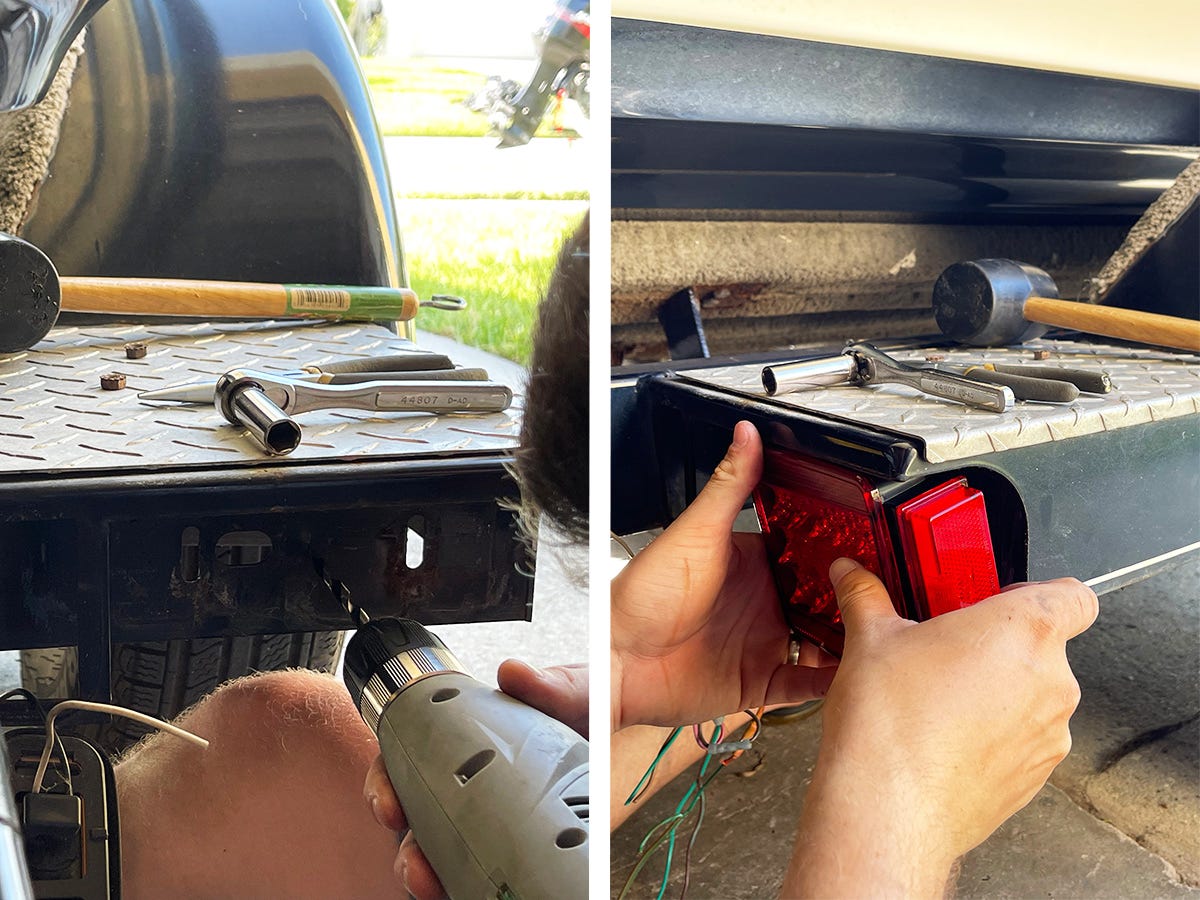
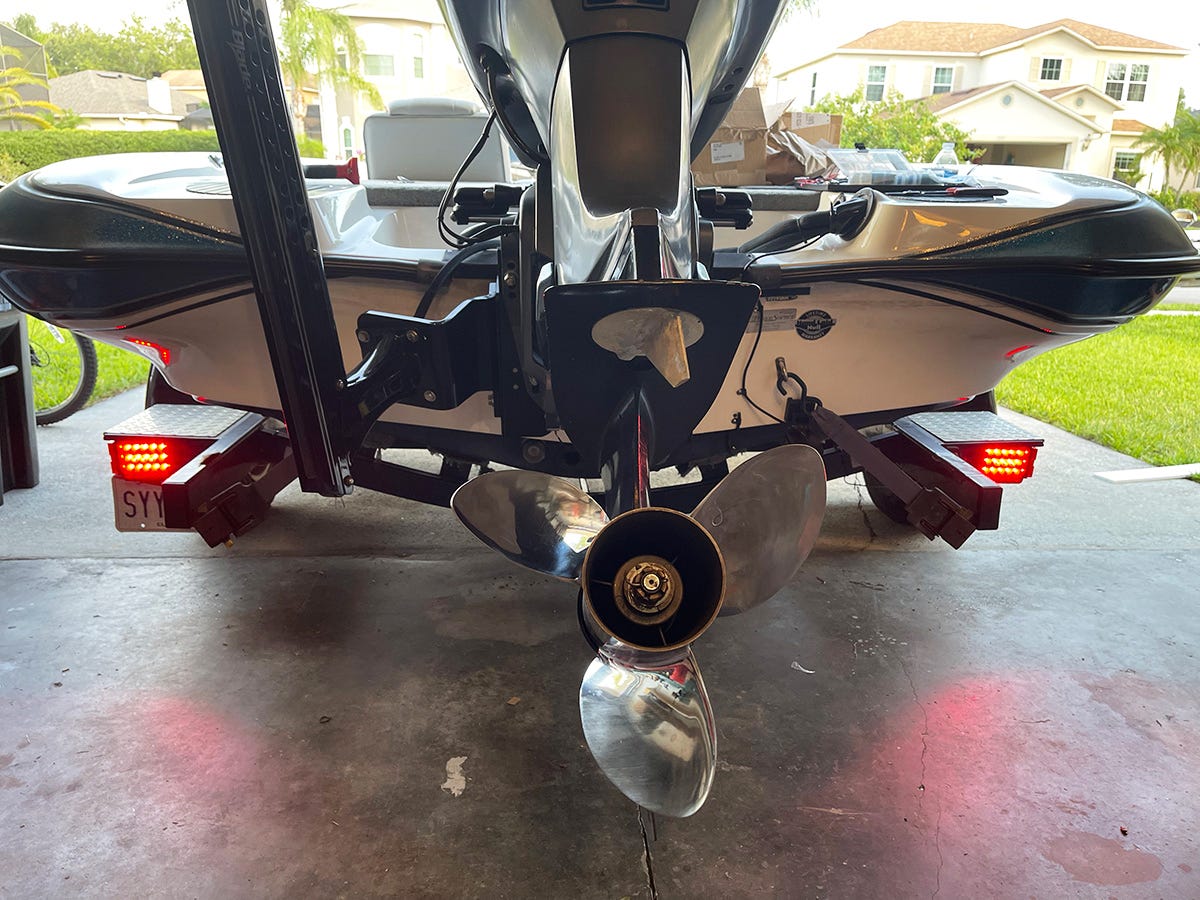
Because the trailer, which carries a 2000 Triton TR-21, is over 80” wide, it is required to have rear clearance lights in addition to the tail and brake lights. As long as the lights are mounted at the widest point of the trailer, this requirement can be satisfied with combination lights that have built-in clearance lights. The different shape of the new lights required drilling one new mounting hole so that the lights could be mounted all the way “outboard” on the trailer to comply with lighting requirements.
In Taylor’s case, that meant mounting the new, narrower, lights as far as “outboard” as possible.
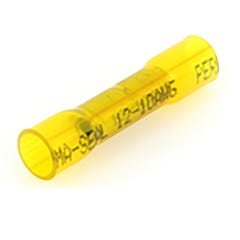
The mounting studs on the old lights had been farther apart than the new ones, so a new hole was needed in the mounting surface. Taylor marked the location of the new hole on each side of the trailer, drilled it, and then bolted the new lights in place. Instead of the wire nuts supplied with the lights, Taylor used marine-grade butt connectors and covered them with adhesive lined heat-shrink tubing (not yet applied in this photo)

Final Connections
For final connections, instead of the wire nuts and tap slices included in the light kit, Taylor chose marine-grade crimp connectors and then covered them in adhesive-lined, heat-shrink tubing to keep water out. Protecting connections from water intrusion isn’t as important on freshwater trailers as saltwater trailers, but it’s still important for extending the life of the system.
Although they cost more up-front than the inexpensive incandescent lights Taylor had used previously, the new LED lights have an expected life of 100,000 hours. They also run cooler and use far less current than incandescent or halogen lights. Taylor’s advice to other DIYers planning to replace trailer lights and wiring: “It seems like it should be a quick job, but it will take longer than you think.
Set aside a few hours, and don’t try to do it the night before a fishing trip!”