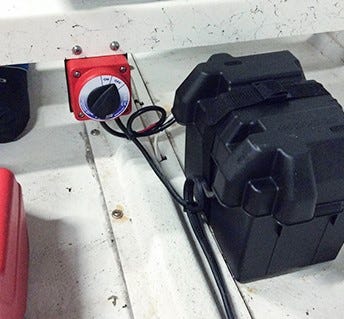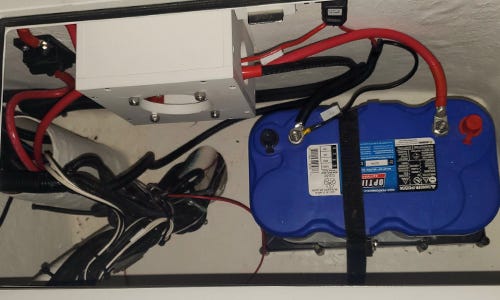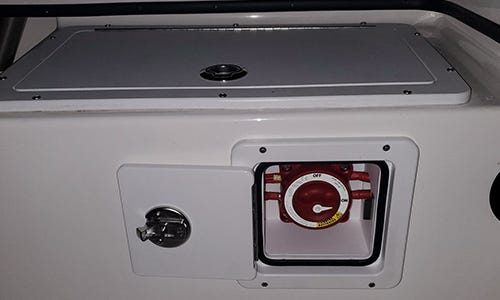

There aren’t many absolutes when it comes to boat rigging. Almost every choice you make comes with tradeoffs. But here’s one thing that’s certain: if your electrical system doesn’t include a battery disconnect or selector switch, you need to add one. And yes, it is worth the modest cost.
Contents
Battery Disconnect Switches
Disconnect switches, designed for use with single-bank systems, function simply to isolate your battery from all loads when in the OFF position.
This protects your battery from both human error (leaving your bait pump on after you put your boat on the trailer, for example) and from the many tiny loads that can slowly discharge it over a matter of days or weeks.
Many accessories — particularly newer electronics and pumps that can be controlled remotely via Bluetooth, wifi, etc. — draw a small amount of current even when switched off.


Many trolling motors, shallow water anchors and anything with an LED indicator lamp that stays on also draw current. The amperage is small, but over enough time it can and does kill batteries. Simply put, a disconnect switch — provided you actually use it — is cheap insurance against finding a discharged battery when you haven’t used your boat for a while. It can also extend the life of your battery.
Battery Selector Switches
Battery selector switches are designed for use with two-bank systems. Note that “bank” simply means a group of batteries working together. In reality, on most smaller recreational boats, each “bank” is composed of just a single battery. But on boats with overnight accommodations, big audio systems, or other equipment that demands lots of electrical power, the so-called “house bank” could also be several deep cycle batteries wired in parallel for increased capacity. For our purposes, though, let’s assume that each bank is a single battery.
On most smaller recreational boats, each “bank” is composed of just a single battery.
When the selector switch is set to the OFF position, both batteries are isolated from all loads.
When the switch is set to 1, the #1 battery powers all loads, including your engine starter(s), and also receives all charge from your engine alternator(s). Your #2 battery is completely cut out of the system.
Likewise, when the switch is set to 2, the #2 battery powers all accessories, starts the engine(s) and is charged by the alternator. The #1 battery is isolated.
When the switch is set to ALL, both batteries combine to start engines and power accessories, and both receive alternator charge.
In multi-engine applications, each engine typically has its own selector switch, but for simplicity we’ll talk about a single-engine system.
“Properly” Using a Battery Selector Switch
Used properly, a battery selector switch allows you to:
- Crank your engine with only your starting battery
- Isolate your starting battery from loads like pumps and electronics when the engine is off
- Charge both batteries when under power
The fact of the matter is that using a manual selector switch “properly” is kind of a pain and almost nobody does it.


This is how the routine is supposed to work: Switch to the 1 position to start the engine with your #1 battery. Once the engine is running, switch to ALL so the alternator can charge both batteries. As soon as you shut the engine down, like at the sandbar or a fishing spot, switch to the 2 position so that pumps, lights and so on draw their power from #2 battery, leaving the #1 battery fully charged to crank the engine again.
Even with a selector switch mounted in an easily accessible location, this is a lot to expect of the average boat owner. Unfortunately, many selector switches are mounted in hard-to-reach places, making it even more impractical.
A Realistic Approach
For most boaters, a more realistic way to using a battery selector switch is to basically operate your boat as if it had only a single battery, reserving the second battery exclusively for emergency needs. This requires that your primary battery be a quality, deep cycle battery sized to easily handle all daily demands — starting, pumps, electronics, stereo, PowerPole, etc. — without breaking a sweat. (It’s a myth that deep cycle batteries shouldn’t be used for cranking.)
Essentially, you’ll turn your battery selector switch to 1 at the beginning of the day and turn it to OFF at the end of the day. Your #2 battery stays isolated unless your #1 battery fails and you need a second battery to start your engine. Of course, this approach requires that you keep your #2 battery charged, either via a charger or periodically switching your battery selector to the 2 position while the engine is running.
Again, this simplified approach works for the “average” boater with a gasoline outboard or I/O, who doesn’t spend the night aboard and doesn’t have high-current accessories like windlasses or big audio systems.
Installing Battery Switches
If you’re simply replacing an existing switch (or switches), installation is relatively easy. First, disconnect cables at the batteries. Then remove the old switch, carefully remove the cables, connect them to the same terminals on the new switch, install the switch, and reconnect the cables to the batteries.
Adding a selector or disconnect switch to a system that hasn’t been designed with one is more challenging. In fact, unless you’re fairly handy and have a good basic understanding of 12V systems, it’s a job you should consider having done professionally. Proper cable sizing is very important here. If you do decide to do your own wiring, Perko, a leading manufacturer of disconnect and selector switches, provides helpful schematics and a video tutorial online: https://www.perko.com/help_guides-wiring_a_battery_switch/
Adding a selector or disconnect switch to a system that hasn’t been designed with one is more challenging.
One important thing to keep in mind for DIYers is that if your boat is equipped with a bilge pump connected to a float switch, it should not be wired through your disconnect or selector switch. Automatic bilge pump systems can and do save boats from sinking at the dock, but they have to be connected to power to do so. Automatic pumps and float switch-pump combinations should be wired directly to your battery.
Battery Switch Location
Beyond wiring, another installation consideration is switch location. Switches should be as close to batteries as possible, but accessibility is also important.
If your switch is too hard to reach, you’re less likely to use it, and if you don’t at least turn it to OFF at the end of the day, it isn’t doing you any good.


Switches don’t need to be completely enclosed (inside a console, for example), but they should be out of direct spray. Most switches are surface-mount, not flush-mount, and extend out 2” to 3” from the mounting surface. They’re also not particularly visually appealing, so ideally they can be tucked somewhere out of direct view.
One innovative solution is our Battery Switch Box , a Starboard box that mounts flush and keeps switches out of sight and out of the weather but still easily accessible. We also offer an inexpensive disconnect switch with its own flush-mount box.
Battery Switch Selection
Battery disconnect and selector switches are made by a number of different well-known companies. Most do exactly the same thing, so factors to consider include amp capacity and physical size, shape and hole pattern.
We carry Perko disconnect and selector switches in medium duty , compact, and heavy duty versions. All three use the same square hole pattern, which matches the hole pattern on many boats that use Perko switches as original equipment.
Battery Options
The medium duty versions have round housings and are direct OEM replacements on many boats. Their 250 amp rating is plenty for most outboard and I/O boats.
The compact versions have a square and slightly smaller footprint than the round medium duty versions and a somewhat higher amp rating of 315.
The heavy duty versions have reinforced housings and are designed to accommodate high-amperage equipment such as diesel starters, large inverters and windlasses.
Some switches are offered in locking versions, requiring a key to switch on.
Some switches are offered in locking versions, requiring a key to switch on. Can these be bypassed by a thief who knows what they’re doing? Sure, if they have some tools and 15 or 20 minutes to spare. But do they also add an important extra layer of security by acting as a deterrent? Absolutely.
Battery Switch Warnings
There’s a very good reason battery switch housings are all printed with the warning, “STOP ENGINES BEFORE SWITCHING OFF.” When the engine is running, and your switch is in one of the “on” positions, current from your alternator is flowing from your engine, through your switch, to your battery.
As soon as you turn your switch to OFF, though, all that current has nowhere to go. In simple terms, it bounces back to your alternator as a huge voltage spike, potentially causing major damage.
