DIY Shrink Wrapping
August 22, 2023 6 min read

In most of the U.S., boating season is winding down, which means it’s time to start thinking about winterizing. And, unless your boat spends the winter indoors, one of the most important aspects of winterizing is covering it tightly to keep out rain, snow, ice, fall leaves, spring pollen, grime, birds, cats, rodents and other undesirables.
Contents
- 1. What You Need to Know Up Front
- 1.1 What’s Involved in Shrink Wrapping Your Own Boat?
- 1.2 Is DIY Shrink-Wrapping Worth It?
- 1.3 When It Doesn’t Make Sense to Shrink Wrap Your Own Boat
- 2. DIY Shrink-Wrapping Tips
- 2.1 Practice First!
- 2.2 Use a Section of Rope To Figure Out How Wide to Order your Wrap
- 2.3 Make Sure your Boat Is as Dry as Possible Before Wrapping
- 2.4 Don’t Wrap Over Marine Paint
- 3. Be Careful!
What You Need to Know Up Front
When it comes to covering options, there’s little debate that shrink-wrapping provides the best protection. A good shrink-wrap job is completely waterproof, slick enough that snow slides right off, virtually impervious to wind, and provides a tighter “seal” than any canvas cover.
The only real knock against shrink-wrapping when compared to canvas or plastic covers is the expense. Sure, a quality canvas cover will set you back several times the price of a professional shrink-wrap job, but the cover can be used for years, while the shrink-wrapping bills keep adding up.
So your two options are:
1. Drop somewhere between $15 and $50 per linear foot of your boat (prices vary by region, complexity of the job, overall size of the boat, and choice of add-ons like zippered access doors) each and every fall for professional shrink-wrapping, or …
2. Save money in the long run by going with the good-but-not-great protection of a custom canvas cover (or, worse, an ill-fitting off-the-shelf cover or even blue tarps and rope).
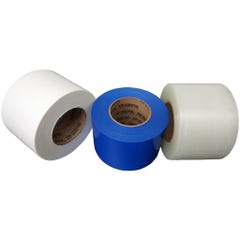
Right? Well, not exactly. In fact, there’s a third choice: doing your own shrink-wrapping. Shrink-wrapping supplies and tools are readily available, and YouTube is brimming with how-to videos.
How realistic a possibility is DIY shrink-wrapping for the average boat owner? Let’s consider that from two angles. First, is it possible to do your own shrink-wrap? Second, is it cost-effective?
What’s Involved in Shrink Wrapping Your Own Boat?
Assuming we’re talking about typical trailer boats here, the answer to the first question is a solid “yes.” If you’re even slightly handy and have a half day to spare, you can shrink wrap your boat. It’s certainly more involved than putting a cover on, but it doesn’t require any special technical skills. Superstructures like T-tops, wakeboard towers and radar arches make it harder, but with time and a couple sets of helping hands it’s do-able.
There are dozens of instructional videos online, but the basic process is to fabricate a “structure” from poly strapping material that prevents low spots in the wrap and allows rain and snow to drain off.
With a central superstructure of some kind, you’ll basically tie straps from that structure to the gunwales.

Without a central high spot, you’ll need one or more vertical 2 x 4 supports to form the high spot(s) in the middle. Think of it as something like a tipi structure.
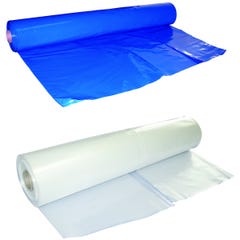
Another strap, the perimeter strap, runs the entire circumference of the boat near the waterline. It is held in place by straps from above, commonly called drop loops, and straps that run underneath the bottom of the boat, usually called belly bands. The shrink wrap material is then draped loosely over the boat and structure, trimmed just below the level of the perimeter strap, and folded around the perimeter strap. The fold around the perimeter strap is “welded” in place with heat, and the opening at the bow is also welded closed.
After that, the remainder of the wrap is heat-shrunk. Finally, vents are installed to prevent mold from moisture trapped under the wrap. Like most things, you’ll get better and shrink-wrapping every time you do it.
Is DIY Shrink-Wrapping Worth It?
Now for the second question: Is it cost-effective to do your own? That one’s a little more complicated.
The fact of the matter is that even compared to the higher end of the price range for professional shrink-wrapping, you’ll likely pay more up-front for DIY supplies and tools than you would to have the job done professionally. (Keep in mind that we’re talking mainly about garden-variety trailer boats here; getting your 45-foot trawler wrapped professionally will cost far more than DIY supplies and tools.)
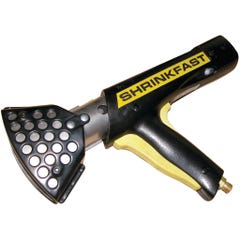
That added initial expense can be offset in several ways, though. First, and most obvious, is the fact that once you’ve invested in a propane heat gun — the single biggest purchase you’ll need to make — you can use it year after year. Plus, chances are you’ll have enough materials left over to wrap your boat at least one more time. You’ll probably at least break even your second year and save more every year thereafter.
Second, splitting the cost of shrink-wrapping tools and materials with one or a few other boat owners makes a lot of sense. Shrink-wrapping is a much easier job with at least two people working, so you and a buddy can split not only the cost of the tools and supplies but also the labor. Just pick a day or two (depending on the size of your group) each fall to work together and get all your boats wrapped and squared away. A partnership like this also allows you to save even more money by purchasing wrapping materials and other supplies in larger quantities.
When It Doesn’t Make Sense to Shrink Wrap Your Own Boat
On the other hand, there are several factors that can make DIY shrink-wrapping less cost-effective. First, the smaller your boat, the less you’ll save with the DIY approach. Nearly all professional shrink-wrapping is charged on a per-foot basis with additional charges for complicating factors like outriggers, towers, etc. So a simple 18-foot bowrider is going to be relatively inexpensive. On the other hand, purchasing your own heat gun costs the same regardless of your boat size. The bottom line is that the smaller your boat, the longer it will take to make up your investment in DIY.
There are no special technical skills required, but it’s going to take you at least several hours and possibly a full day.
Additionally, if you’re simply not DIY-inclined, the savings likely won’t justify the added work of shrink-wrapping your own boat. Again, there are no special technical skills required, but it’s going to take you at least several hours and possibly a full day. You’ll be climbing in and out of the boat repeatedly while making the structure and then — for all but the smallest boats — spending a lot of time on a ladder while shrinking the wrap. In short, it’s a simple enough job, but it takes time, and it’s relatively physical.
Finally, keep in mind that it will take at least two years of DIY shrink-wrapping and possibly three before you realize any savings (assuming you don’t split costs with partners). That means you’ll want to be fairly sure you’re going to stay in a location where winterization is required for at least a few years, that you’re going to own a boat for at least a few years, and that you’re not going to make any ownership changes that might make shrink-wrapping unnecessary, such as moving to a smaller boat than can be stored inside.
All things considered, DIY shrink-wrapping is potentially a very smart choice for owners of trailerable boats in regions with cold winters. The longer you do it, the better you’ll get at it and the more money you’ll save.
DIY Shrink-Wrapping Tips
This article isn’t intended to be a how-to. We recommend carefully reading the documentation that comes with your shrink-wrapping tools and supplies and watching instructional videos. That said, here are several valuable tips that can save you time and money and produce better results.
Practice First!
Handling a 3,500-degree open-flame heat gun is a little intimidating at first. Before aiming it at your boat, get a feel for the process by wrapping something else — like a sawhorse, for example.
Use a Section of Rope To Figure Out How Wide to Order your Wrap
Throw a piece of rope over the highest spot on your boat. Tape one end to the waterline on one side of the boat, then mark the rope where it meets the waterline on the other side. Then measure the rope and order wrapping material a few feet wider than that.
Make Sure your Boat Is as Dry as Possible Before Wrapping
Shrink wrap doesn’t breathe, so if you do a good wrapping job, any moisture that’s in your boat when you apply the wrap will stay there. Water in the bilge or in the bottoms of wells or compartments as well moisture in wet PFDs, upholstery, carpet can cause mold problems. Yes, vents help, but getting your boat’s interior and bilge as dry as absolutely possible before wrapping is key.
Don’t Wrap Over Marine Paint
Although some boat owners claim to wrap boats painted with Awlgrip or a similar two-part marine topside paint with no ill effects, paint manufacturers advise against it, saying that shrink-wrapping over their products traps moisture against them and can cause blistering or delamination.
Be Careful!
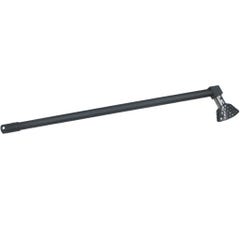
Again, handling a 3,500-degree heat gun is serious business. So is touching heated plastic. Protect your hands with heavy leather safety gloves. Also keep a fire extinguisher nearby, and be very careful with gasoline fumes. Always plug tank vents while working.