
Sometimes, we find ourselves forced to do things that we actually want to do, but that we’re too cheap or too lazy to do without a push. Such was the case with my recent push pole holder upgrade. Like many of my recent projects, however, had I known the difference it would make, I would have done it a lot sooner.
Push Pole Holder Upgrades
I’ve had a long and sordid history with push pole holders on all of my boats. It’s been a love/hate relationship of function vs. form. My first boats didn’t have them, and I was forced to tie my (usually homemade) push poles down with ropes and cleats. Back then, ANY push pole holder would have been a welcome guest on my boat.
That attitude remained until I got my first true flats boat and experienced the “joy” of fixed push pole holders. It only takes a few stubbed toes and one session of being tripped overboard to learn to hate fixed push pole holders.
My second flats boat introduced me to the particular joy of broken push pole holders, and I still have the scars on my feet to prove it.
My initial plan was to simply replace the holders with the same model, but I soon recognized that this was an opportunity to upgrade them.
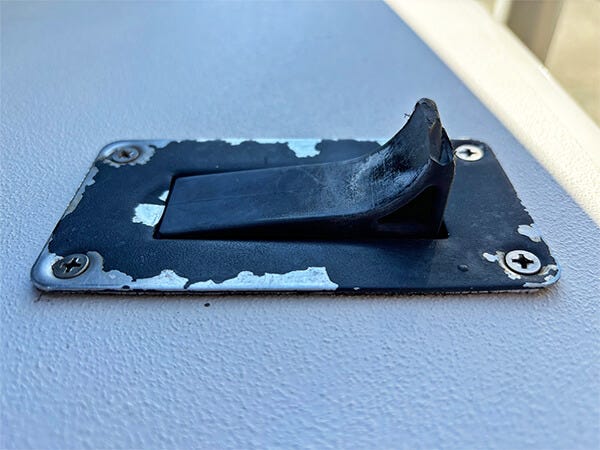
When I finally upgraded to my current flats skiff, the folding holders that came with it were an outsized selling point. Sure, they were ugly, cheap, and marginally functional, but in the winter months when I didn’t use them, they were recessed, out of sight, and out of mind.
Broken Push Pole Holders
Those old push pole holders and I had a pretty good relationship right up until my truck and boat were stolen from my driveway. The thieves had a particular penchant for hitting speed bumps at high speeds, so I was fortunate that my boat broke free early enough in the getaway to end up abandoned and minimally damaged in an adjacent neighborhood a couple of miles away. My truck was less lucky and was found several days later totaled in some local woods.
As for the boat, the biggest loss was my retractable push pole holders. Ugly as they were, I was crushed to see them broken beyond repair.
My initial plan was to simply replace the holders with the same model, but I soon recognized that this was an opportunity to upgrade them with something that enhanced the look and utility of my boat.
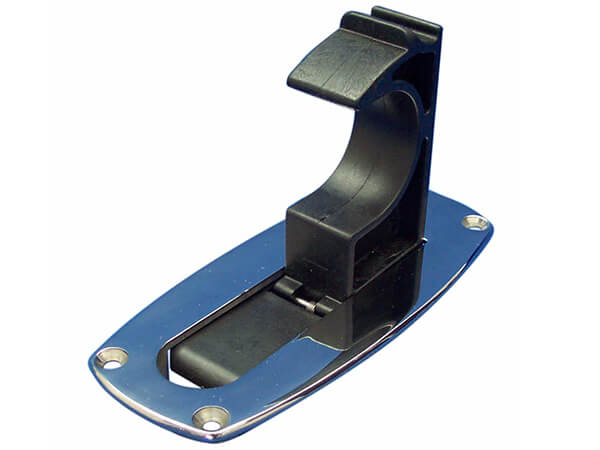
After an extensive search of available options, I ran across the Accon Marine Flush-Mounted Push Pole Holders and immediately liked what I saw.
I ordered them in the hopes that they would be simple “drop-in” replacements, but upon their arrival, I realized I would need to do a little work.
Required Cutouts for Flush-Mount Push Pole Holders
For better or worse, installing flush-mount push pole holders entails more than just a few screw holes. Whether you are installing flush-mount push pole holders in your boat for the first time, or upgrading to new ones, the most gut-wrenching part of the project is cutting a hole in your deck.
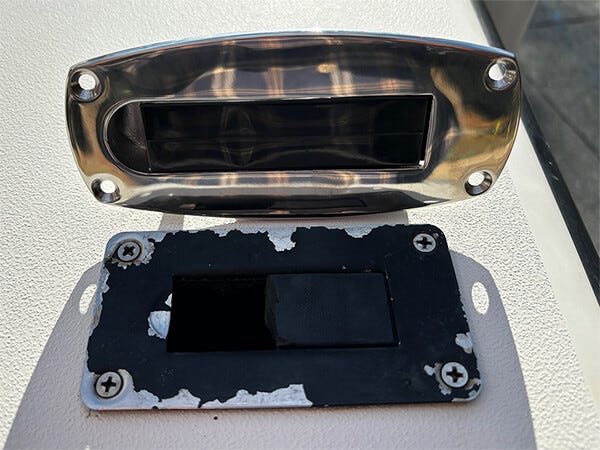
In my case, my old push pole holders were much smaller and shaped differently than the larger Accon holders, requiring me to enlarge the cutout.
Thankfully, the Accon holders came with a handy template, making the planning for the cut relatively easy.
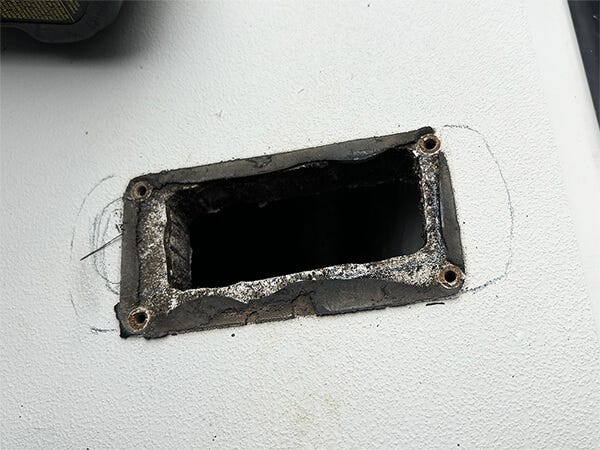
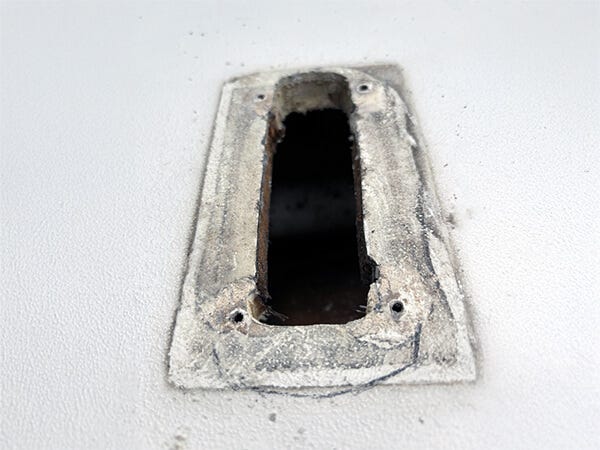
Twenty-four years of dirt and grime had accumulated underneath the old holders, discoloring the deck.
In addition to the different cutout size, I also had to deal with a few other challenges. First, the screw holes in the new Accons didn’t align to those for my original holders, and the overall footprint of the holder was shaped differently.
Second, 24 years of dirt and grime had accumulated underneath the old holders, discoloring the deck, which was now partially visible and would require cleaning.
Finally, Maverick is a quality manufacturer, and they had used copious amounts of sealant to keep the holders in place, all of which need to be removed. I had a lot of clean up work to do, and that I had to be careful in my placement to ensure I covered the old holes.
Removing Old Sealant
Cleaning up the old sealant and grime took at least as much time as the rest of the install. Once again, my trusty drywall mud scraper and Pro-Strength Goof Off were my best friends.
After scraping up as much of the old sealant as possible, I cleaned the area with Dawn dish soap and water. With the easy stuff gone, I sprayed Goof Off on the remaining stain and scrubbed away a layer at a time.
I’d learned from similar projects that, when using Goof Off, you need to wipe the area immediately after spraying it, which is a little counter intuitive.
Cleaning up the old sealant and grime took at least as much time as the rest of the install.
Because it was a small area, I scrubbed by hand, but in hindsight, I would have been much better served to use my dual action polisher equipped with a terry cloth pad along with the Goof Off to completely remove the old residue.
Enlarging the Existing Cutouts
Once the area was clean, I needed to enlarge the cutout. The template provided with the Accon holders was only one part of the equation. I also need to make sure that the enlarged cut out would position the new holder to cover the old screw holes. To do this, I had to make a template of the new push pole holders, including the position of the screws, then mark the deck appropriately. Once that was done, I was able to place the cutout template in the right area and mark where the new cutout needed to be.
While the old saw of “measure twice, cut once” is a bit tedious, measuring and marking up my deck was the easy part. Making permanent cuts required more commitment.
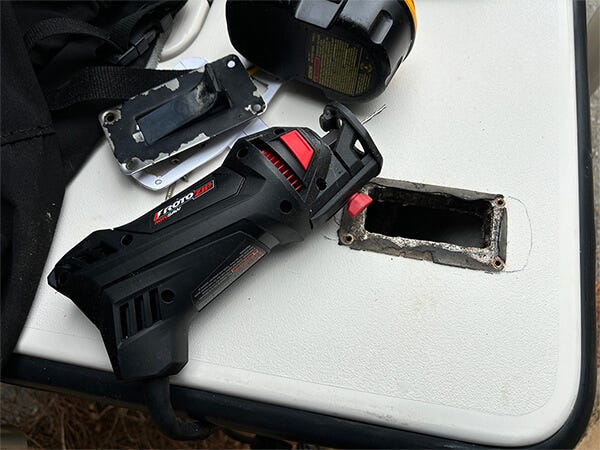
My Maverick deck is foam cored, and I wasn’t sure what the best tool would be to make clean cuts. Initially, I’d planned on using a jigsaw, but decided to try a Rotozip.
I underestimated the amount of fiberglass dust I would create, and got to enjoy some itchy forearms for the next 48 hours.
While it may have been a little slower, the Rotozip ended up making very clean cuts and was easier to control, especially for small adjustments.
I underestimated the amount of fiberglass dust I would create, and got to enjoy some itchy forearms for the next 48 hours. If you take this project on, don’t forget to take proper precautions.
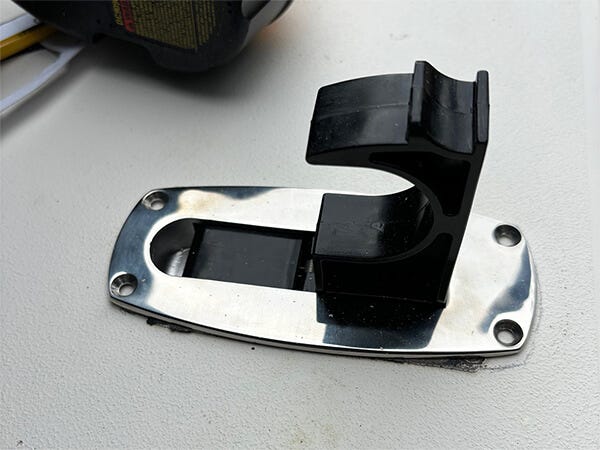
One additional note on the Accon holders: When you are making your cutout, make sure you test the opening with the holder both extended and folded, as it requires a different cutout size when it is folded than when it is extended. This tripped me up on the first installation, and I had to go back and extend the cutout slightly to allow the holder to be fully retracted.
Final Installation
The rest of the installation was relatively straightforward. Because the pressure on these holders is primarily lateral, I was able to simply drill the four screws directly into the deck without reinforcement underneath. If you do reinforce, beware of compressing the foam-cored decking and use the appropriate hardware to properly secure the holder.
Once the holders were dry-fitted, the final step was sealing the inside of the cutout and the screw holes to keep water from soaking into the foam core of the deck.
A thin skin of 4200 worked well for this, but epoxy resin would work as well.
Once the holders were dry fitted, the final step was sealing the inside of the cutout and the screw holes to keep water from soaking into the foam core of the deck.
Once complete, a thin bead of 4200 on the bottom of the push pole bracket bonded the holders to the deck, strengthening the mechanical bond of the four screws and further sealing the area from water intrusion.
An Aesthetic and Functional Upgrade
The final result was better than I’d hoped. Not only were the new holders a major improvement aesthetically, they offered improved functionality as well. The Accon holders snap into both their open and closed positions and they hold the push pole slightly higher off the deck. This last characteristic is important, since push poles are, by design, very flexible and can smack into the deck in rough conditions.
While these holders are designed to be unobtrusive and out of the way, I was surprised by how much they dressed up the boat.
While these holders are designed to be unobtrusive and out of the way, I was surprised by how much they dressed up the boat. In the end, while I’m not exactly sure I’m ready to thank the thieves that made this project necessary, I am rather happy with the end result.


