
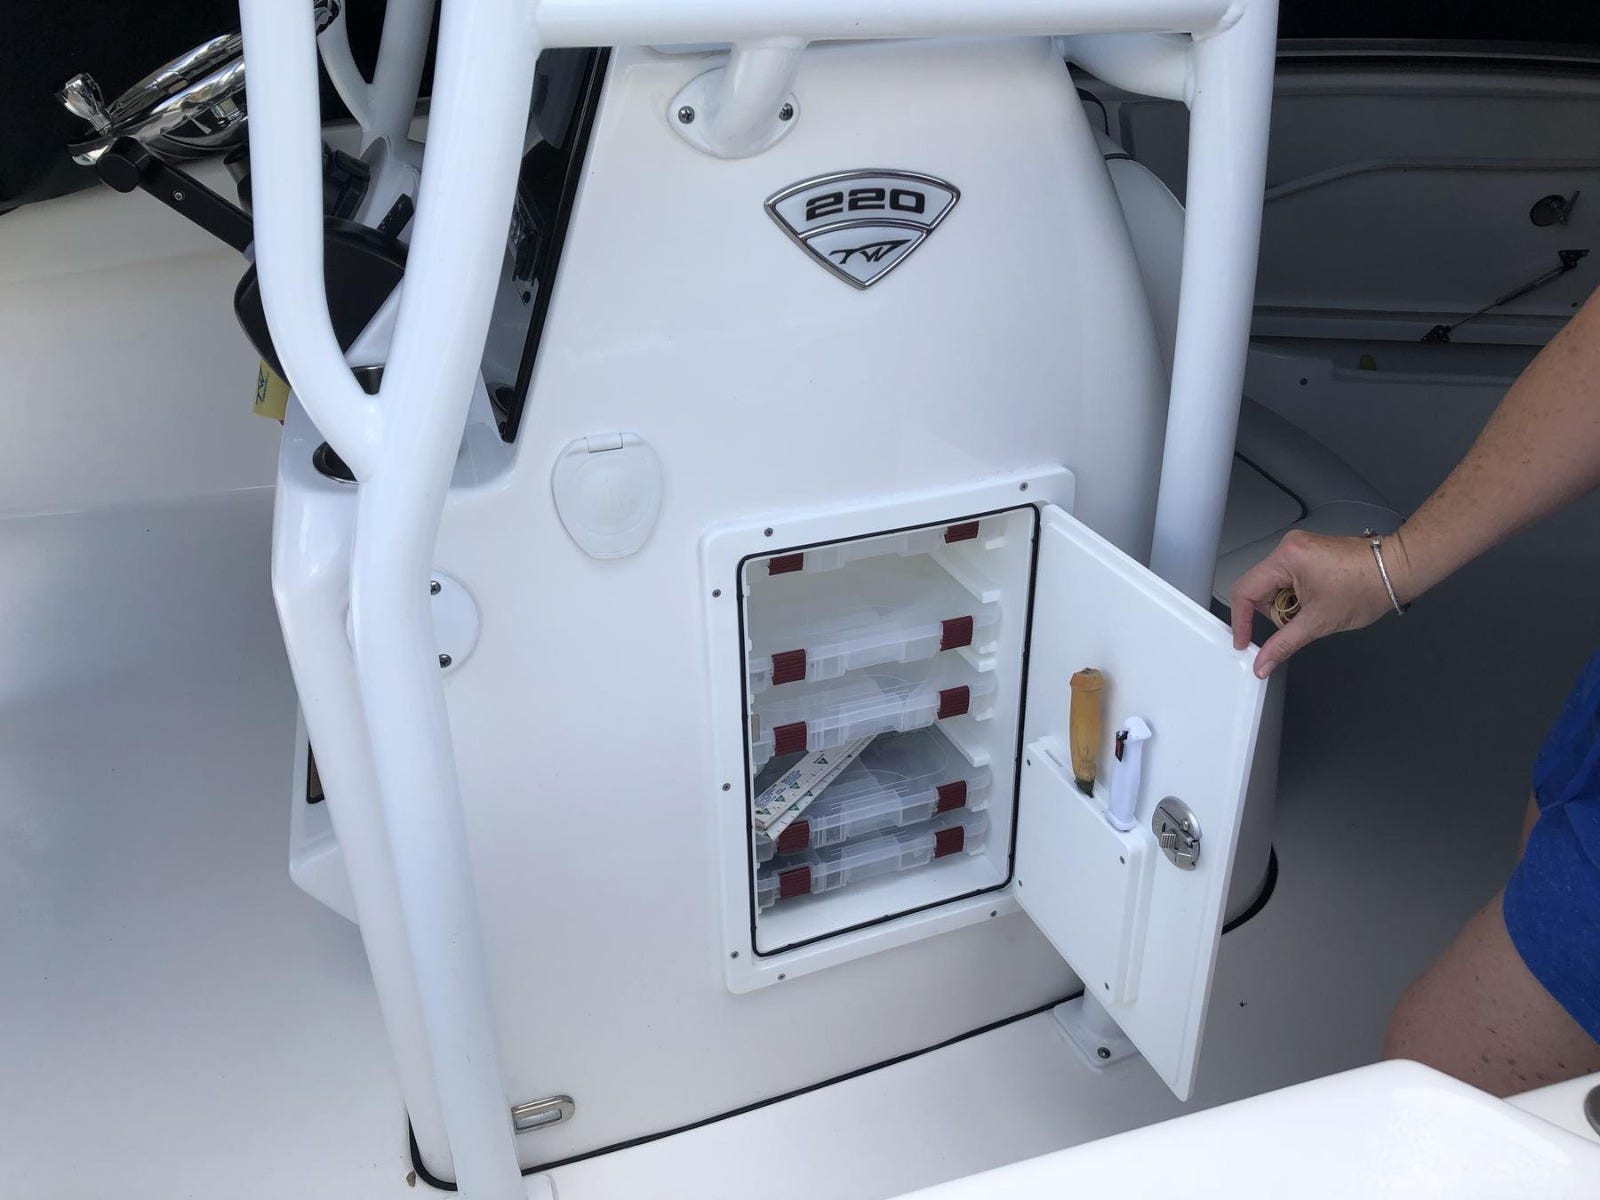
Installing a Boat Outfitters inset, face-mount storage unit is well within the abilities of most DIYers, but it does require a bit of forethought and careful measurement. Installation by yourself is possible even with larger units, but a helper makes the process much easier.
These instructions apply to most drawer units, glove boxes, tackle boxes and tilt-out boxes with Starboard frames. The procedure is different for inset units with powder-coated aluminum frames and hidden fasteners.
Contents
- 1. Steps To the Detailed Procedure
- 2. Step 1: Make Sure you Have Enough Room
- 3. Step 2: Marking Your Cutout
- 4. Step 3: Drill Your Starter Holes
- 5. Step 4: Make Your Cutout
- 6. Step 5: Check Your Fit and Mark Your Holes
- 7. Step 6: Drill Fastener Holes
- 8. Step 7: Apply Marine Sealant
- 9. Step 8: Install Fasteners and Clean Up
Steps To the Detailed Project
When it comes to organizing and optimizing storage space on your boat, installing an inset face-mount storage unit can be a game-changer. This detailed procedure guide will walk you through the step-by-step process of seamlessly integrating this storage solution.

Required Supplies:
- Painter’s tape
- Marine sealant
- Stainless steel fasteners — either #8 oval-head self-tapping screws or #8-32 oval-head machine screws with large washers and nylon-insert lock nuts
Required Tools:
- Tape measure
- Square
- Pencil
- Drill
- 9/64” drill bit (if mounting with self-tapping screws)
- 11/64” drill bit (if through-bolting)
- 3/8” drill bit
- Jigsaw, oscillating tool (example: Fein) or rotary tool (example: RotoZip) with appropriate blade for cutting fiberglass
- Phillips screwdriver
- 11/32” (or adjustable) wrench
Step 1: Make Sure you Have Enough Room
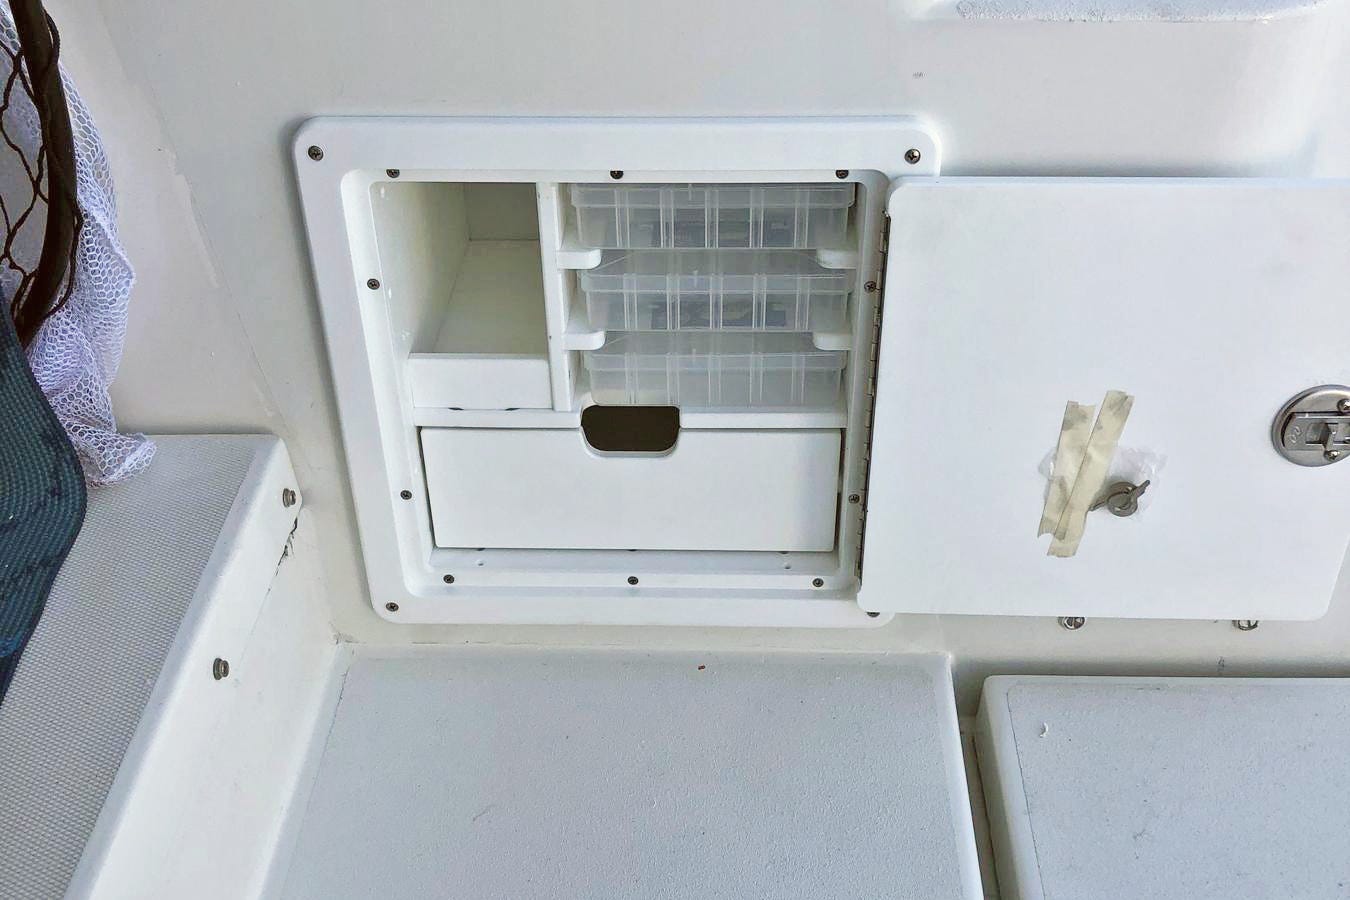
Remember that the frame is larger than the required cutout. On most units, the frame extends 7/8” past the cutout on all sides. If there’s any question about whether the frame of the unit will fit on the planned mounting surface, the easiest way to make sure is to turn the unit around backward so that the door faces the mounting surface and test the fit.
When you have the unit positioned where you want it, trace the outline of the frame on the mounting surface. Also, make sure before cutting anything that you have sufficient depth for your unit behind the mounting surface and that there are no wires, fuel lines, or other obstructions in the way.
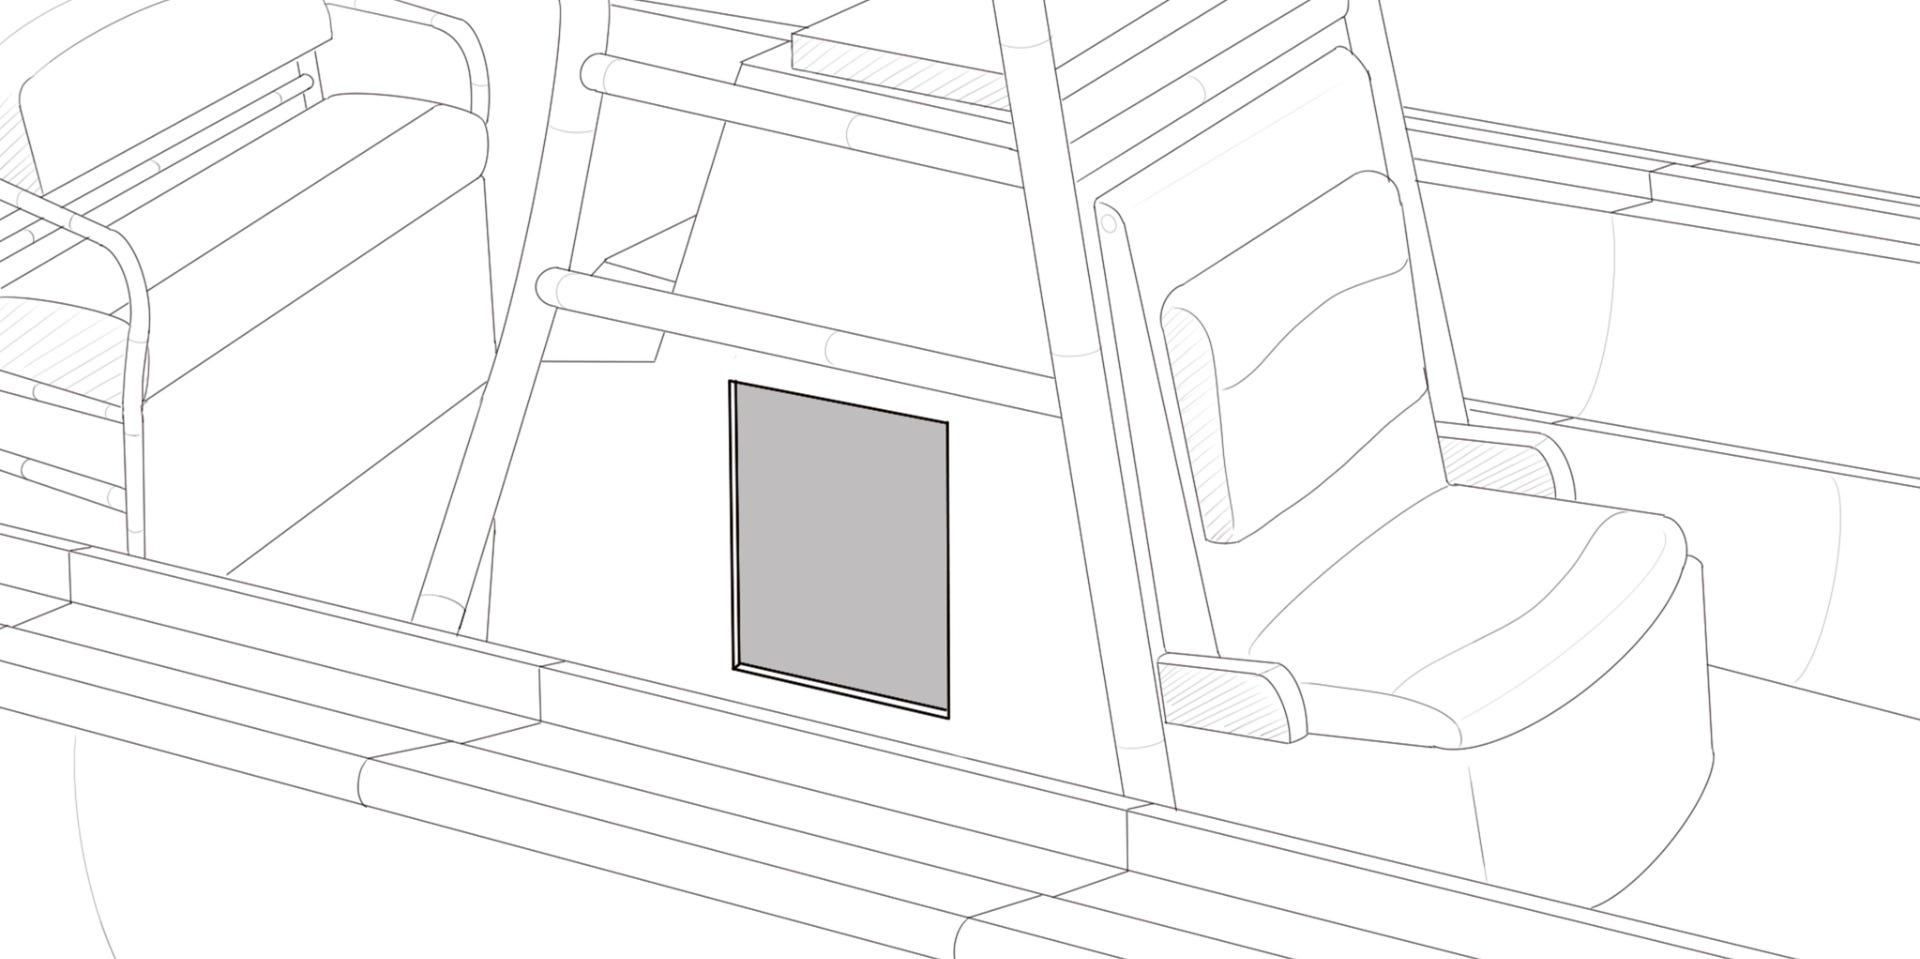
Step 2: Marking Your Cutout
Once you’ve decided where you want to mount the unit, mark the outline of the required cutout. Note that the dimensions of the cutout are not the same as the back face of the storage unit. If you trace the back of the unit onto your mounting surface, your cutout will be too small.
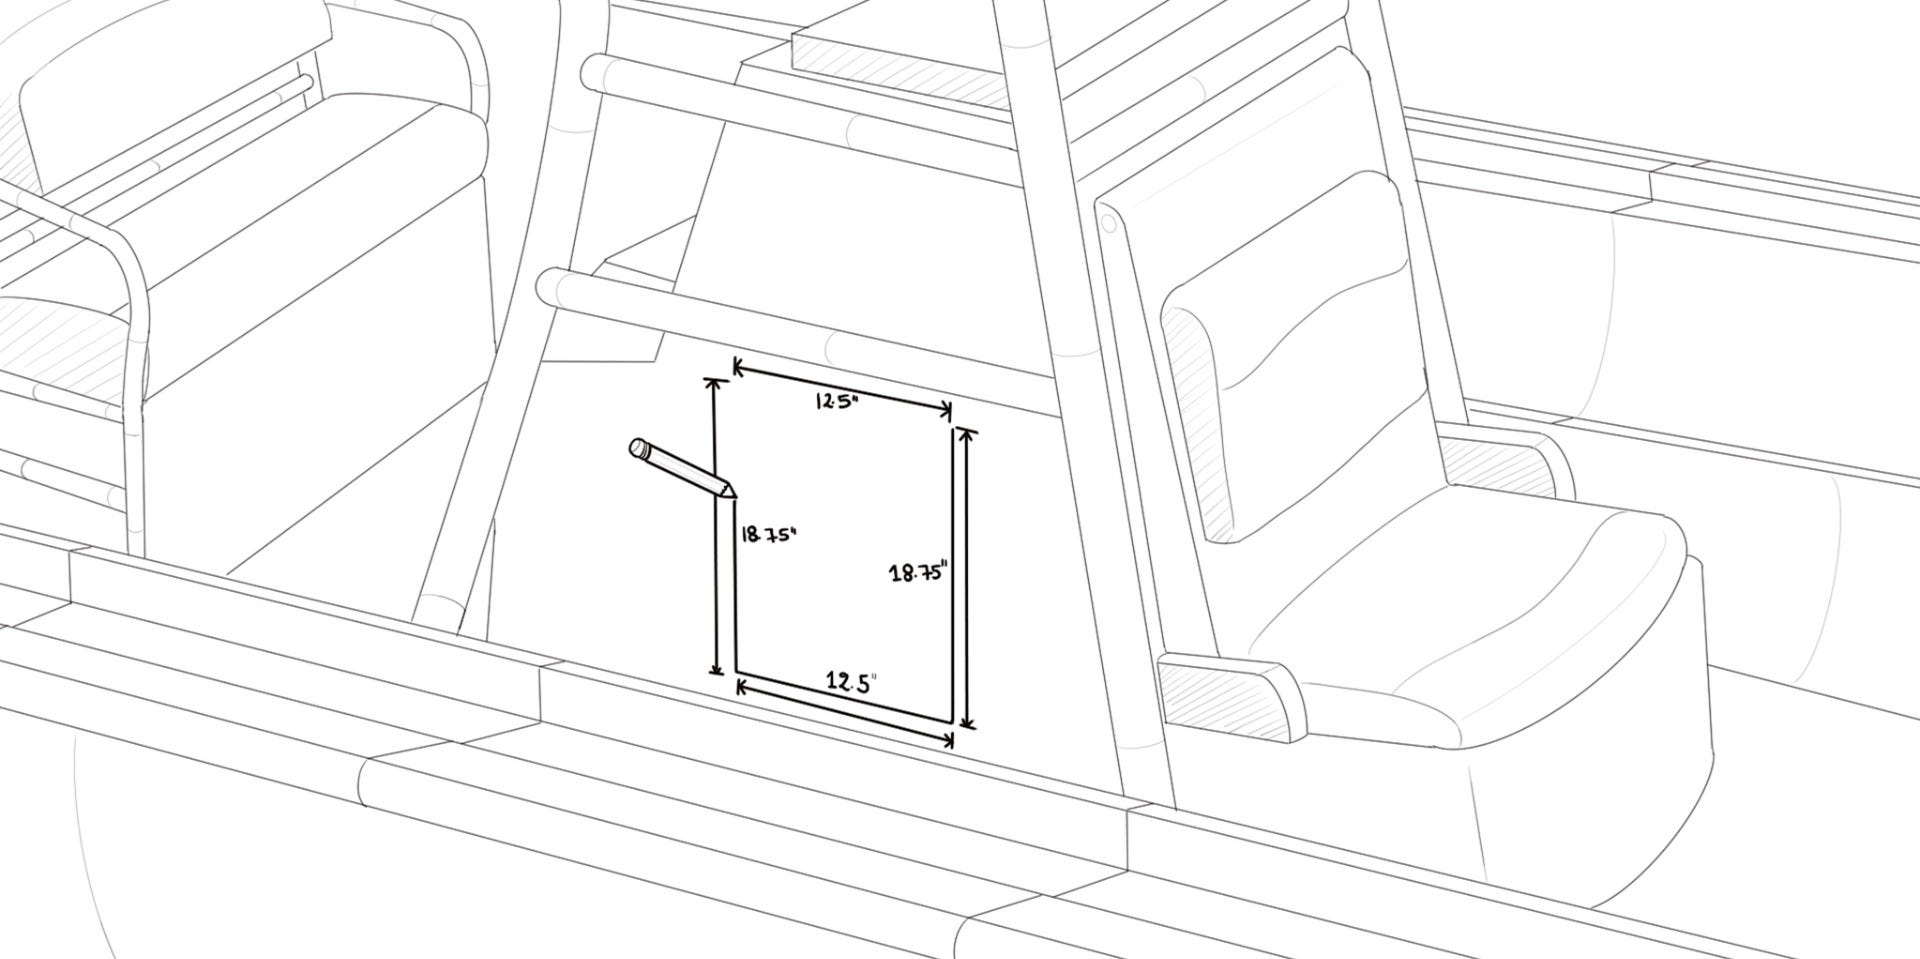
Instead, refer back to your storage unit’s page on the Boat Outfitters website for the cutout dimensions. These dimensions include an extra 1/8” all around for clearance.
Do not make your cutout larger than the recommended size.
If you traced the outline of the frame in the previous step, you can use that as a reference to draw the smaller cutout inside it. Otherwise, use a framing square or other tool to make sure the corners are 90 degrees. Once you’ve marked the cutout, double-check that all angles are square by measuring the two diagonals. The measurements should be the same if the corners are square.
Step 3: Drill Your Starter Holes
Use a 3/8” drill bit to make “starter holes” in the four corners of your cutout. In reality, this bit can be any size large enough to fit the blade of your cutting tool into.
If you make your cuts with an oscillating tool, starter holes may not be needed.

When drilling into gel-coated fiberglass, we recommend placing painter’s tape over the area first to minimize gelcoat cracking. Starting the hole with your drill in reverse for a few seconds to “score” the gelcoat is also helpful.
Step 4: Make Your Cutout
To minimize gelcoat cracking, we recommend carefully taping around the edges of your cutout with painters tape.
Then use a jigsaw with a fine-toothed blade, an oscillating multitool (like a Fein Multimaster), or a rotary saw (like a RotoZip) to make your cuts.
Step 5: Check Your Fit and Mark Your Holes
With your cutout finished, dry fit your unit. If you applied painter’s tape before cutting, leave it in place for this step.
If your unit won’t fit into the cutout, make small adjustments as needed with a cutting or sanding tool.
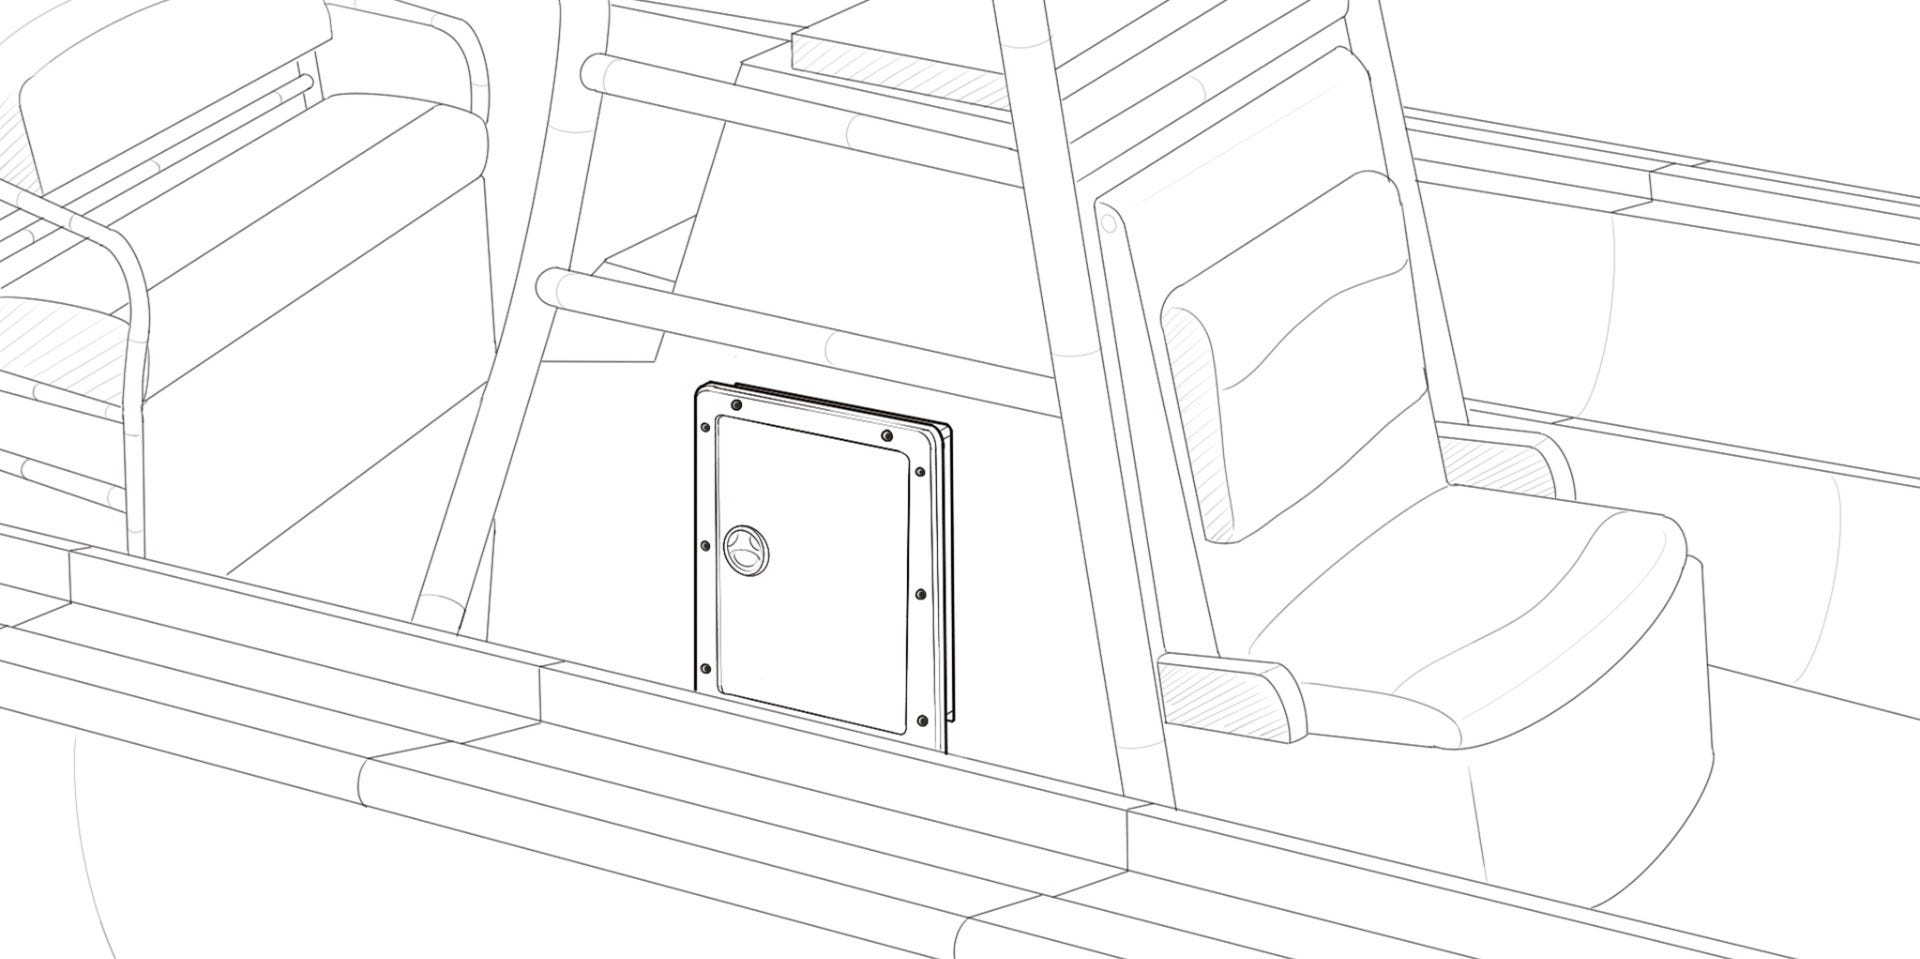
If you used a fairly large drill bit for the starter holes in the corners of the cutout, the corners may be too rounded and need to be “squared up.”
Once the unit fits into the cutout, hold it tightly in place while you use a pencil to mark the locations of the pre-drilled fastener holes in the frame. These marks should be on the painter’s tape. (Alternatively, instead of marking the locations of your holes and then removing the unit to drill, you can drill your fastener holes directly through the pre-drilled holes in the frame while the unit is in position.)
Step 6: Drill Fastener Holes
Through-bolting is always preferred over mounting with screws, but screws are sufficient. To mount your storage unit with self-tapping screws, we recommend #8 oval-head screws that are long enough to go all the way through the laminate.
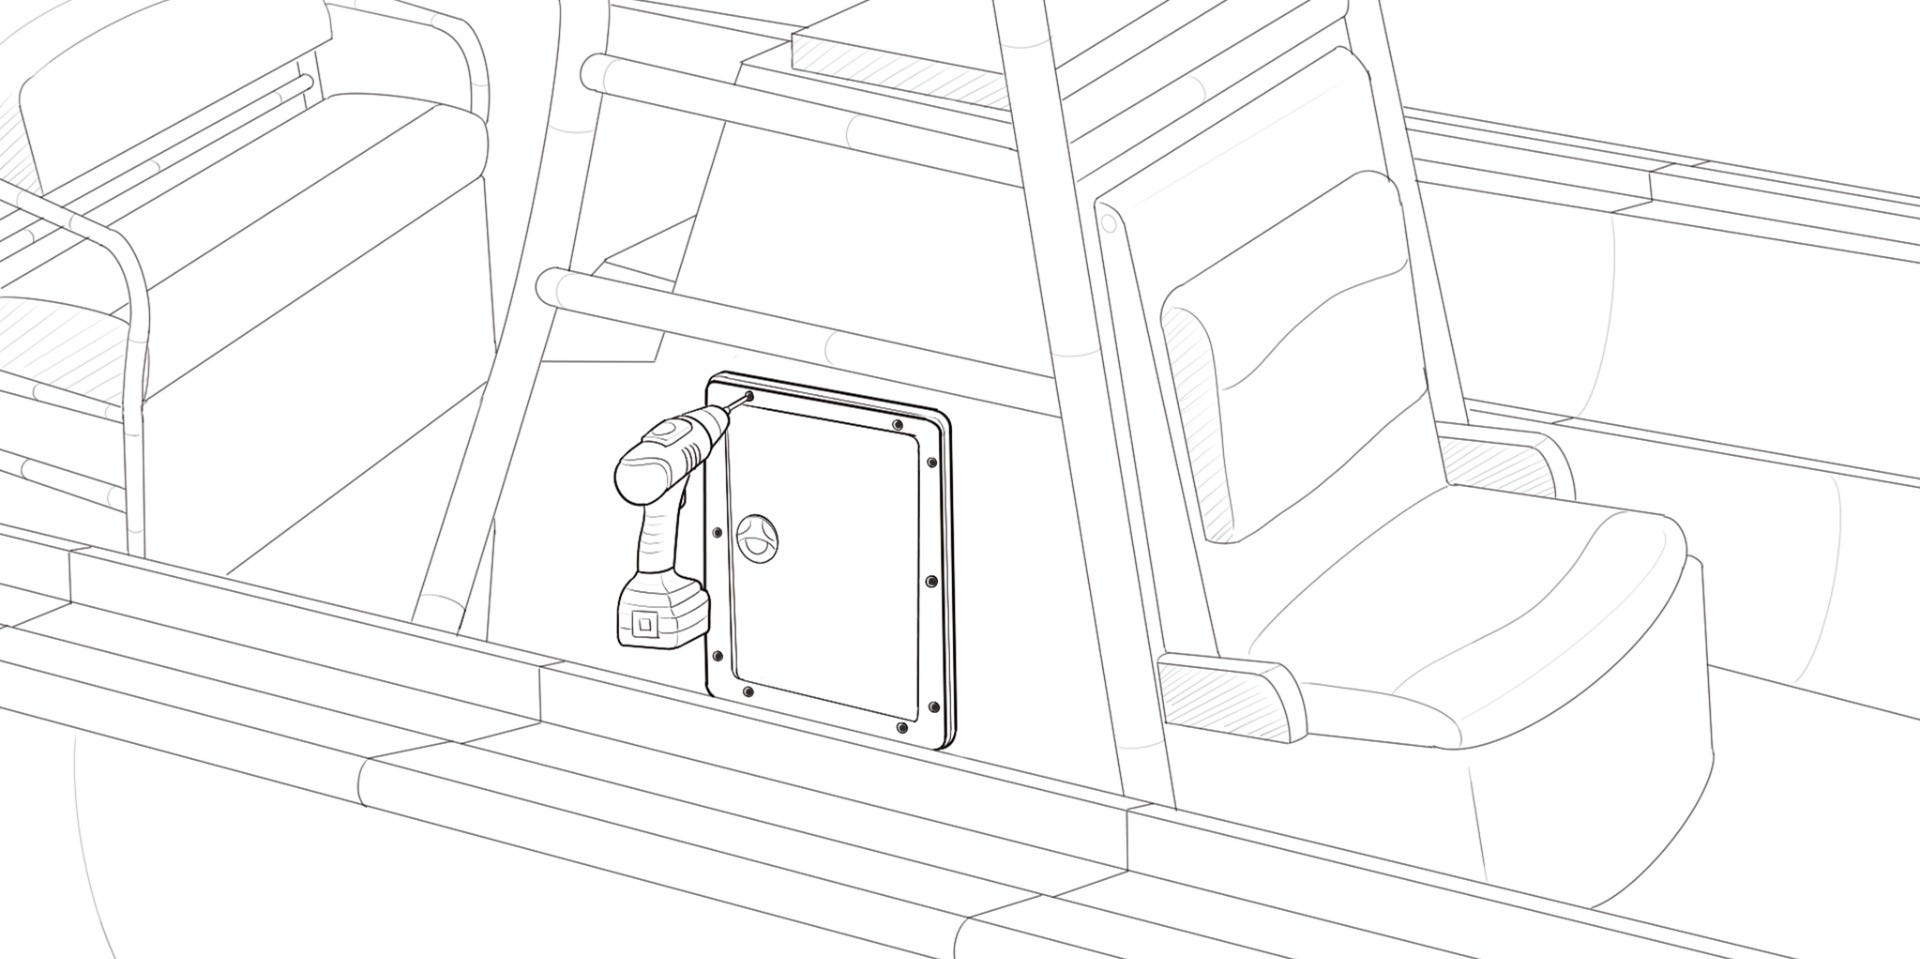
For through-bolting, we recommend #8-32 oval-head bolts (technically machine screws) with fender washers and nylon lock nuts. If you’re using screws, drill your mounting holes with a sharp 9/64” bit. For through-bolting, use an 11/64” bit.
The painter’s tape left over from making your cutout will help minimize gelcoat cracking. If using self-tapping screws, you can further reduce the possibility of cracking by using a slightly larger drill bit to countersink your fastener holes. Be careful! You just want to enlarge the opening in the gelcoat, not the fiberglass.
Step 7: Apply Marine Sealant
Once your fastener holes are drilled, it’s time for the final installation. Before applying the sealant to your storage unit, though, you’ll want to seal the exposed edges of the laminate left by your cutout. Unthickened epoxy is the best choice; just “paint” it onto the exposed fiberglass and core with a chip brush or even wipe it on with a gloved finger. Marine sealant will work too; it’s just a bit harder to get an even coat.
Marine sealant will work too; it’s just a bit harder to get an even coat.
After sealing your laminate, remove the painter’s tape you applied in Step 4. Then squirt a dab of marine sealant into each of the fastener holes and run a smooth bead around the back of the frame on your storage unit to seal between the unit and the mounting surface.
For easier cleanup, we recommend running painter’s tape on the mounting surface around the outside edges of the frame. That way, when you tighten your fasteners, excess sealant will squeeze out onto the tape, not the mounting surface.
Most quality marine sealants will do the job, but we do not recommend high-strength polyurethane adhesive sealants like 3M 5200. No sealant sticks very well to Starboard, but 5200 will be a bear to remove from the mounting surface if you ever need to. Our preference for use with Starboard storage units is Sudbury elastomeric sealant, which is easy to use, fast-curing and adheres better to Starboard than other sealants.
Step 8: Install Fasteners and Clean Up
Position the storage unit in the opening and install the screws or bolts. We recommend installing all fasteners just tightly enough to hold the unit in place, and then tightening opposites.
In other words, don’t just work your way around the perimeter; try to tighten the unit evenly against the mounting surface.

Finally, clean up any excess sealant according to the manufacturer’s directions.