
Despite your best intentions to remain a fly/light tackle purist, chances are you’ll eventually run into a situation where you need a decent rod holder or two on your flats skiff. Maybe you’re trolling plugs down the beach for mackerel. Maybe you’re putting a live bait out on a flatline while fishing a nearshore reef. Maybe you’re flying the flag at the sandbar on the 4th of July. Maybe you’re *gasp* anchored up soaking chunk bait under a bridge.
Regardless, on the majority of flats skiffs, you’re not going to find that rod holder you need. A few models meant for bigger water come with a pair of flush-mount holders, but many have only under-gunwale rod racks. Others have vertical rod holders on the console sides, but those don’t work very well for actually fishing, since you’re constantly ducking the lines. At best, there’s a rod holder or two mounted to the poling platform legs.
A Smart Solution for Flats Skiffs
You can always add rod holders, but finding a suitable location can be a challenge, since deck real estate and under-gunwale space are both at a premium on flats skiffs. Additionally, flats skiff owners tend to favor simplicity and subscribe to the less-is-more approach in outfitting their boats. Adding more stainless hardware to their clean decks isn’t appealing to most of them.
One interesting option for adding rod holders to a flats skiff is a relatively new product that combines a flush-mount rod holder with a cleat. Instead of adding more hardware, these combination rod holder-cleats can simply replace the existing stern cleats.
For this project boat, an Andros 18 that frequently ventures outside the inlets to bottom fish and troll, they seemed like a perfect fit.

This project boat, an Andros 18, had only under-gunwale rod storage and vertical rod holders on the console. Because it sees a fair amount of use running the beach and fishing nearshore structures, a pair of flush-mount rod holders will add significant functionality.
The Detailed Steps To Take
The detailed steps for installing this combo are crucial to ensuring a seamless integration that aligns with your boat's design and your fishing preferences. Follow the guide below to take each step with precision, unlocking the full potential of your rod holder/cleat combo for a more efficient and enjoyable fishing experience.

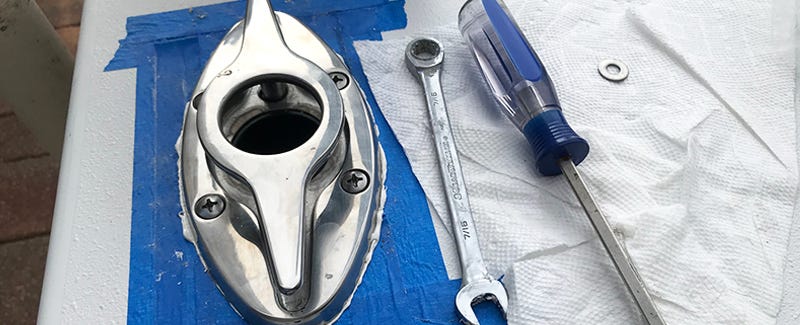
Step 1:
After checking to make sure there was sufficient clearance under the deck for the rod holder tubes, the existing pull-up cleats were removed.
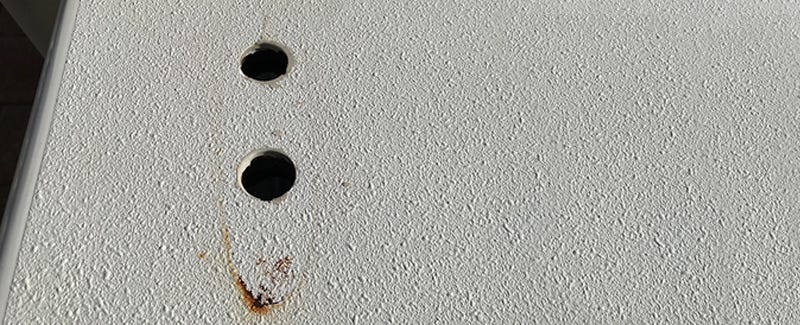
Step 2:
Old sealant was carefully scraped off, leaving a few small spots of stubborn rust from 12 years of crevice corrosion.

Step 3:
Rust stains were removed with Barkeeper’s Friend, an effective rust remover. After scrubbing off everything you can, make a paste of Barkeeper’s Friend and water and let it sit on the stain for a few minutes before scrubbing.
Use a Scotchbrite pad or stiff nail brush if necessary.
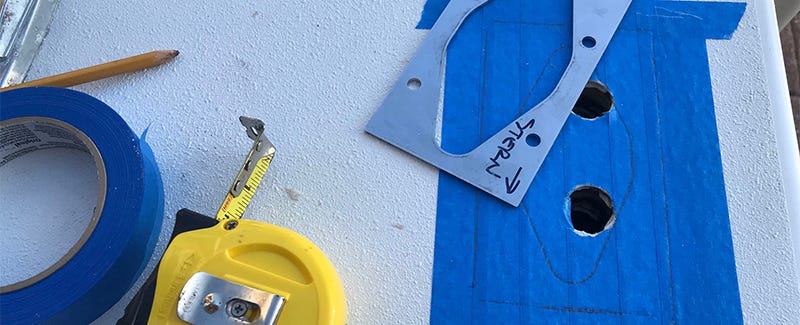
Step 4:
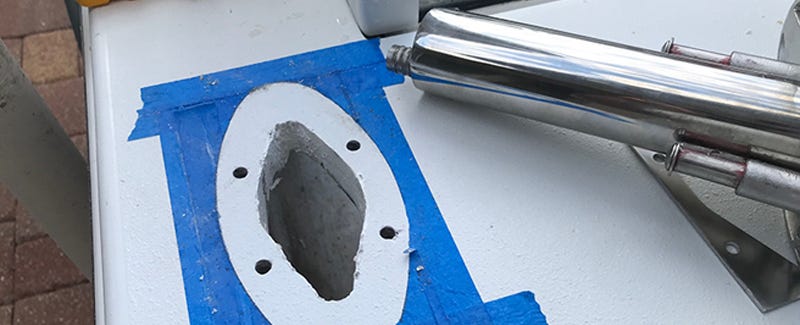
The work areas were taped. The supplied backing plates, which also function as templates for the cutout, were positioned, and the outline of the cutouts was traced.
The plates are not symmetrical and are delivered with forward and aft ends marked in Sharpie.
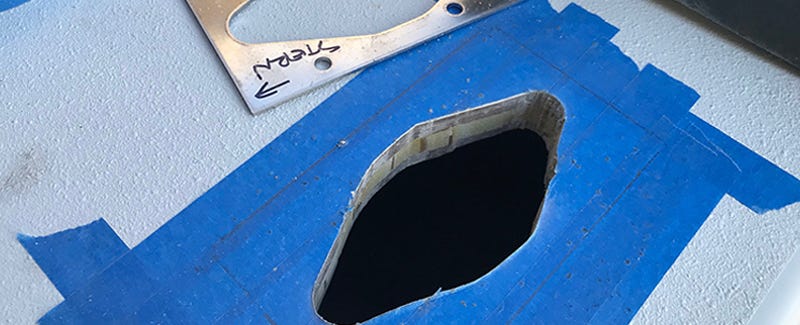
Step 5:
The cutouts were made with a jigsaw and a narrow, fine-toothed blade. The laminate was thick and dense, and it was slow going.
Step 6:
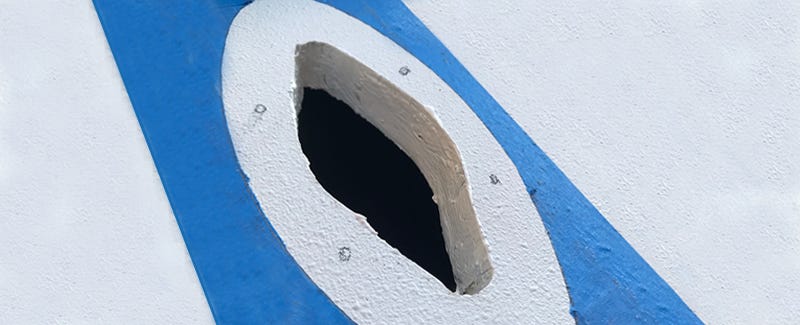
Rod holders were dry fitted in cutouts and adjusted so they were in the same position on both sides of the boat. A razor blade was used to score the tape around the outline of the rod holder flange, and the tape was removed.
The inside walls of the cutouts were coated with epoxy to waterproof the exposed laminate and then left to cure overnight.
Step 7:
Holes were marked and drilled. Don’t mark and drill all four holes at once. Instead, mark and drill the first hole, put the part in place, and insert the first screw. Then mark the location for the second hole.
Now remove the part and drill the second hole. Then put the part in place and insert the first two screws to mark the location for the third hole. Remove the part and drill the third hole. Repeat the process for the remaining holes.
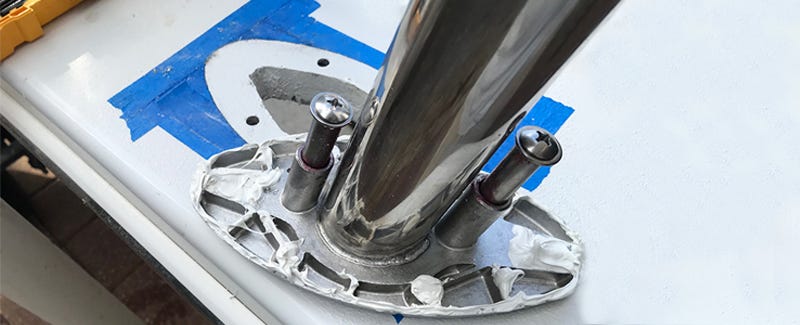
Step 8:
The underside of the rod holder flange was coated liberally with sealant around the perimeter and screw holes. A polyether sealant was used. Polyethers, e.g., 3M 4000UV, provide good adhesion on metal and gelcoat but can be disassembled without too much difficulty, unlike high-strength polyurethanes, e.g., 3M 5200. They also don’t yellow in the sun like polyurethanes.
Step 9:
Cleats were fastened in place with 1/4”-20 x 2” oval head machine screws with washers and lock nuts.

Step 10:
Excess sealant was cleaned up, and tape was removed.
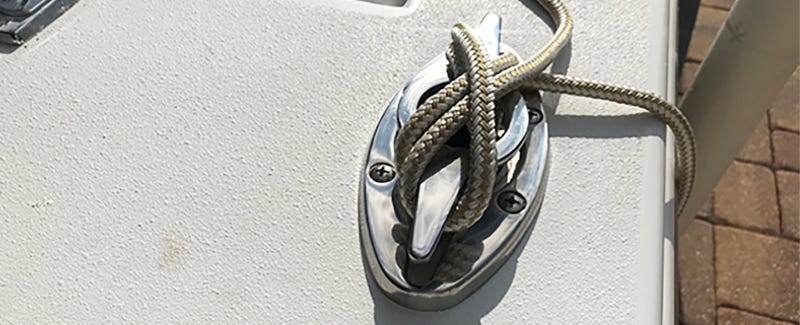
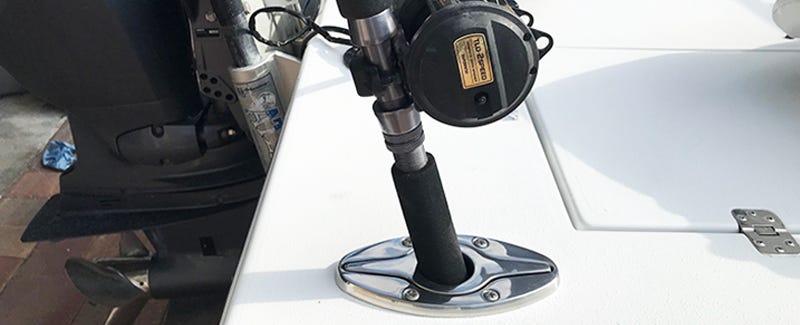
In the extended position, the new parts function as aft cleats. When the cleats are pushed down, they become much-needed 15˚ flush-mount rod holders.