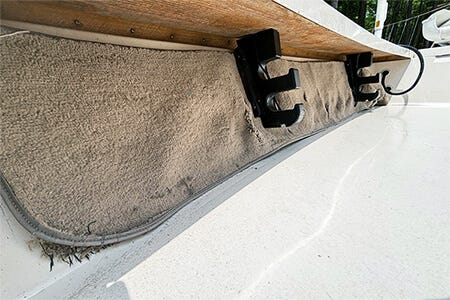

I still remember the sinking feeling that I got when I noticed the original under-gunnel carpet on my Maverick was starting to fall apart. In fairness, it had lasted 23 years, but I’d read horror stories on various boating forums about the cost and effort of replacing it. I have a bad combination of being both OCD and cheap, and the two don’t play well in the same sandbox.
For an entire year, I agonized over what to do, all the while watching more and more of the tattered carpet pull free. When I started finding palmetto bugs making good use of the space, I decided it was time to man up and get the project done. If I’d realized how easy and economical a fantastic outcome could be, I would have attacked this project much, much earlier.
Contents
DIY Under-Gunnel Foam Pads?
There were two issues that had me paralyzed about the project. The first was deciding what to replace the carpet with. I considered going back with carpet, which would have been cheaper, but I’d seen the fancy, laser-engraved SeaDek-style materials and knew that’s what I wanted.
In addition to looking nice, foam decking doesn’t absorb water and easier to keep clean than carpet. The problem was that a quote from a local installer put it well beyond my price range. I love my boat, but she’s 24 years old, and I couldn’t get right with spending that kind of money on something that was primarily for looks.
Doing the project myself was an obvious way to save money, but that would mean dealing with whatever lurked behind the original carpeting. I hoped that the carpet didn’t hide raw fiberglass, but even if it was installed over finished gelcoat, I strongly suspected that the chore of removing 24-year-old carpet glue would keep my chiropractor happy – if the effort didn’t kill me first.
Working With Boat Outfitters
In my time writing for Boat Outfitters, I’ve highlighted other boat owners who have done custom projects, but I’d never done it myself.
All of the customers I’ve talked to had told me how easy it was, but I was still a bit intimidated. I’m a writer, not an engineer, and I have a unique talent for mismeasuring things.
I’m a writer, not an engineer, and I have a unique talent for mismeasuring things.
While my project was relatively simple, the shape and position of the under-gunnel rod racks meant very tight tolerances and a level of accuracy that generally eludes people of my personality type. I quickly discovered that Boat Outfitters is used to dealing with people like me, and they made the task very easy.
Measuring for the Foam
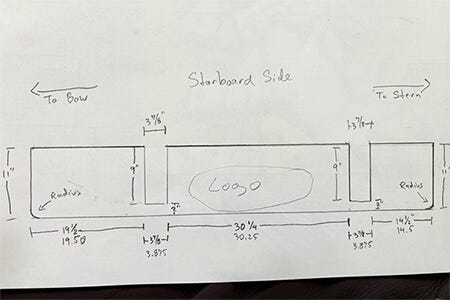
The first thing I did was provide my project manager at Boat Outfitters with a rough sketch of what I was looking for. Length and height measurements were simple and straightforward, but the notches for the rod racks required some discussion. I wanted the foam decking to butt up against the rod racks with minimal gaps, but that meant that my measurements had to be perfect.
Once I was confident that I had the measurements as accurate as I was capable of, my project manager recommended we give an extra 1/16” of wiggle room on either side. When I got to the final install, that recommendation made all the difference. Turns out that my knack for mismeasurement had struck again, but the extra tolerance saved me.
I knew I wanted a teak color with a black Maverick logo, but as a redfish addict, I wanted my target species to be properly represented.
Designing the Under-Gunnel Pad
With dimensions figured out, the next question was design. I knew I wanted a teak color with a black Maverick logo, but as a redfish addict, I wanted my target species to be properly represented. Again, my project manager made it easy. He simply had me do a quick internet search for an image I liked, and I sent him the link.
Within a couple of days, he and his engineer worked up several options for me to review. The winning option wasn’t even something I had considered, but was better than I had envisioned.
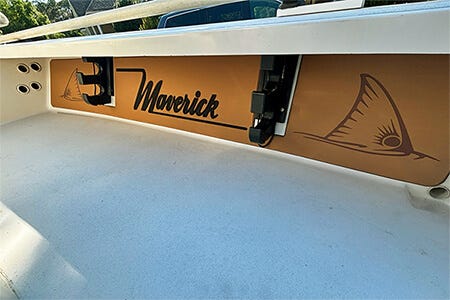
The Maverick logo was cut on a CNC machine, while the redfish tails were laser-engraved.
The final step was determining what radius size I wanted for the corners, and my project manager sent me a tool that made it easy to decide. With dimensions and design locked down, I had about two weeks to get the gunnel area prepped for the installation. In typical form, I procrastinated until the last possible minute, still dreading what I expected to be a back-breaking slog to remove 24-year-old carpet glue.
Removing the Old Carpet and Glue
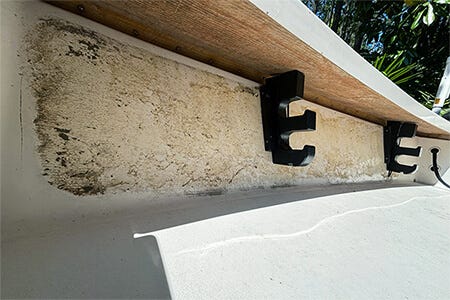
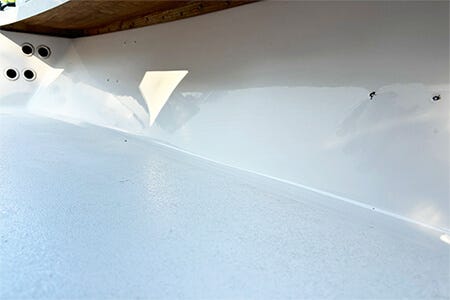
Exhaustive internet searches over that two-week timeframe had only confirmed my fears. The good news was that, after removing the old carpet, I discovered that the area had been finished off with gelcoat.
With that revelation, however, I now had to find a solvent that was strong enough to eat hardened adhesive, but that wouldn’t damage gelcoat. As is often the case, the internet had plenty of opinions but no good answers, so I wandered through the Home Depot paint department checking labels on the various solvents available. I finally decided to try Goof Off Pro Strength adhesive remover in an aerosol can.
Testing the Adhesive Remover
When I got back home, I sprayed a small test area and left it on overnight. The next morning, I was greeted with good news and bad news.
The good news was that it hadn’t damaged the gelcoat. The bad news was that the glue in that area was still hard as a rock.
On a whim, and with my morning cup of coffee still in hand, I grabbed a terry cloth rag and jumped into the boat to find out what I was dealing with.
I sprayed the same area, but this time, instead of letting it sit, I immediately scrubbed it.
Viola! The glue wiped away easily.
I sprayed a larger area, and this time let the solvent sit for a moment before wiping it away, assuming that the pause would let the solvent work its magic longer. No go. The glue was hard as a rock. Confused, I sprayed the same area and again wiped it away immediately. The glue wiped away easily. Eureka!
Discovering the Right Removal Method
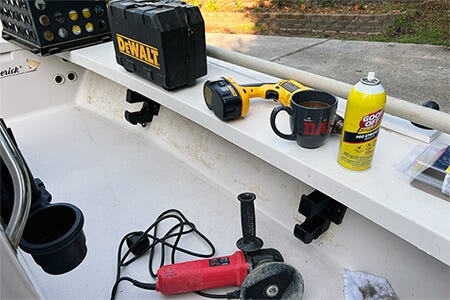
While counter-intuitive, I now had my answer. Time to break out the power tools. I grabbed my dual-action polisher and a terry cloth bonnet and got to work. A quick spray of the Goof Off and an immediate high-speed pass with the polisher made quick work of the area. Before I’d even finished my coffee, I had removed the majority of the hardened adhesive from the area.
A quick spray of the Goof Off and an immediate high-speed pass with the polisher made quick work of the area.
All I had left now were sections that had apparently gotten an extra-heavy glue treatment in the original installation.
I found a metal scraper and soon discovered that a spray-and-scrape technique made quick work of the problem, but it also scratched the gel coat.
Putting the metal scraper inside a terry cloth rag solved that problem, and within ten minutes, I had the entire area glue-free.
I took my last sip of coffee. It was still warm.
Prep and Installation
My project manager had warned me that proper preparation of the area was critical to ensuring the foam decking stuck properly, so I gave the entire area another full wipe down with the Goof Off, then polished it with 3M Finesse It II, and finished by washing the area with Dawn dish soap to remove any remaining residue. I gave the area a final rinse, then let it air dry while I was at work. The decking material had arrived, and I hoped to install it that evening.
Installation couldn’t have been simpler. After a dry fit confirmed that my measurements (including the extra tolerances) had been accurate enough, I was initially concerned about how to get the single, long piece installed properly. I knew that, once I removed the plastic coating over the adhesive backing, I would need to wrestle with 72 inches of sticky decking material without letting it stick somewhere unintended before I was ready.
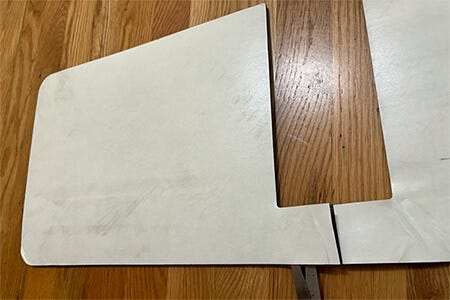
I cut the plastic backing into sections, leaving it in place, so that I could peel one section at a time as I installed it.
To solve this, I cut the plastic backing into sections, leaving it in place, so that I could peel one section at a time as I installed it. With the help of my son, we had the entire piece installed in a matter of minutes.
An Upgraded Look Plus Protection for Reels
The result far exceeded my expectations.
I hadn’t realized how much the moth-eaten carpet had impacted the overall look of the boat.
The under-gunnel rod rack is a highly visible area, and the sharp, clean look of the foam decking made an even bigger impression than I anticipated.
The Maverick logo and laser cut redfish tails gave the area an upgraded look, with the added benefit of protecting reels from boat rash when they are stored there.
Easiest and Most Rewarding Boat Carpet Replacement
I am a frequent visitor of many boat forums, and the issue of replacing old, rotting carpet comes up frequently. In most cases, the commentary would lead you to believe that the project is an expensive, back-breaking nightmare, and it was precisely those comments that caused me to delay the project on my own boat. In hindsight, and thanks to my Boat Outfitters project manager, this project was one of the simplest and highest-impact improvements I’ve done to my boat, and the cost is a fraction of what other foam decking companies had quoted me. If you are contemplating a similar project, stop putting it off. It is easier, and much more rewarding, than you may think.
In hindsight, and thanks to my Boat Outfitters project manager, this project was one of the simplest and highest-impact improvements I’ve done to my boat.

