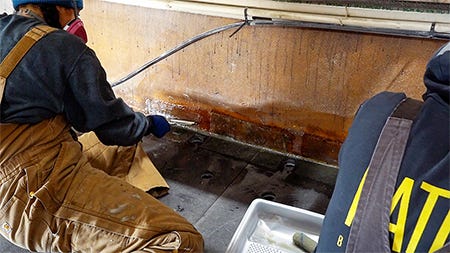

Danielle and Tommy — the creators behind “Slow Car Fast Home,” a popular Instagram account chronicling their RV renovations and subsequent travels throughout North America — have big plans for their 1978 SeaCamper trailerable houseboat.
Their list of intended destinations reads like a boating bucket list: Lake Tahoe, Lake Powell, Lake Champlain, Flathead Lake, Catalina Island, Puget Sound, San Francisco Bay, coastal North and South Carolina, Bimini, the Florida Keys, the Sea of Cortez and a voyage up the Inside Passage to Alaska. And those are just the highlights.
First, though, there’s a lot of restoration to do. After repairing the stringers using Coosa composite board, it was time to fabricate and install the cabin sole (aka floor).
Choosing the Core Material
In fiberglass boat building, decks and soles are typically made of cored fiberglass panels, which are lighter weight and more rigid than solid fiberglass panels, all else being equal. The “core” is some kind of sheet material, which is then covered on both sides with a layup of fiberglass and resin. In the early days of fiberglass boats, plywood was the go-to core material.
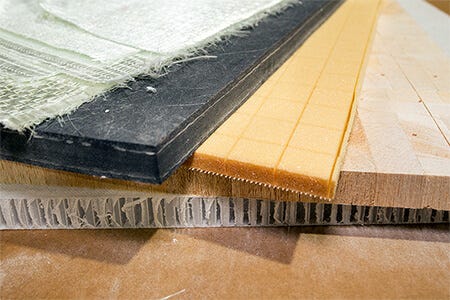
Today, wood is still used in some boats, but various composite panel products have largely superseded it. They include polypropylene honeycomb like NidaPlast, closed-cell PVC foam like Divinycell, and fiber-reinforced high-density polyurethane foam like Coosa Bluewater board. The original interior floor in the SeaCamper was cored with 3/4” plywood that had long since rotted by the time Danielle and Tommy acquired the boat.
Different Coring Options
Different core materials have distinctly different characteristics and are generally best suited for certain applications. There are several important considerations when choosing a core material for decks and soles.
As a general rule, lighter is better in boat building, but the lightest core materials, honeycomb and PVC foam, come with some tradeoffs. Neither has much inherent strength, for example; rather, they are strong only when laminated with fiberglass.
Coosa and plywood, on the other hand, are strong and rigid on their own and get even stronger when laminated.
Additionally, neither honeycomb nor foam holds fasteners well. Self-tapping screws find little purchase in the low-density core, while through-bolts can easily crush lower density core if overtightened.
Plywood and Coosa, though, provide good purchase for screw threads and are highly resistant to the crush pressure exerted by through-bolting. That means that panels cored with foam or honeycomb need to be reinforced in areas where accessories like cleats, rod holders, leaning posts, etc. will be installed.
The primary advantage of core materials like honeycomb and PVC foam is their relatively light weight.
For Danielle and Tommy’s SeaCamper project, the choice was fairly easy. The primary advantage of core materials like honeycomb and PVC foam is their relatively light weight. Although the SeaCamper is a surprisingly capable planing hull, shaving off a few pounds here and there simply isn’t a priority on this project.
Coosa Board Wins
On the other hand, because Danielle and Tommy will build a fully custom interior, having a floor they can screw or bolt their cabinetry and seating to with no concerns about strength is very important.
That left them with a choice between plywood and Coosa.
In this comparison, plywood’s only advantage is lower initial cost. Coosa is not only lighter weight but also won’t absorb water, rot or delaminate.
Coosa is not only lighter weight but also won’t absorb water, rot or delaminate.
Cutting the Panels
Coosa Bluewater 26 composite panels measure 8 feet by 4 feet, and the cabin sole on the SeaCamper is roughly 9 feet by 7 feet, so the floor had to be composed of several sections.
Additionally, the new floor would have to be brought inside the cabin via the windows, limiting the maximum size of each section.
Danielle and Tommy figured that the most efficient way to cover the space was with three sections of Coosa, each spanning the width of the cabin area.
That would create two seams running across the width of the boat. For strength, each of the seams would need to fall on top of a vertical bulkhead.
Danielle and Tommy figured that the most efficient way to cover the space was with three sections of Coosa, each spanning the width of the cabin area.
Step 1
The first step was laying out and cutting the three sections. As with the stringer repair, Danielle and Tommy first cut the floor sections out of plywood in order to get them exactly right before cutting the more expensive Coosa.
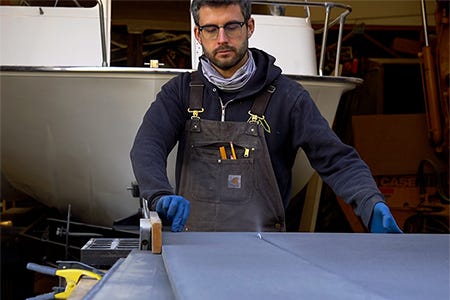
With the plywood templates perfected, they traced the shapes onto the Coosa and cut them out with a combination of saws — a table saw for long, straight cuts; a circular saw for shorter cuts; and a jig saw for curves and angles.
Carbide blades make cutting Coosa much easier.
Step 2
After cutting the three floor sections, Danielle and Tommy were able to mark the location of the two bulkheads that would support the seams between sections. They then used cardboard to make templates for the bulkheads before cutting the final parts out of Coosa.
For the bulkheads, they chose to use two pieces of 3/4” Coosa glued together with epoxy putty, reasoning that the wider top surface would provide more support for the floor seam, as well as more room for error. The bulkheads were bonded to the inside of the hull with thickened polyester resin and tabbed to the hull and stingers with 1708 biaxial fiberglass.
Installing the Floor
Danielle and Tommy considered leaving the underside of the new Coosa floor uncoated, which the manufacturer says is acceptable since Coosa is inherently strong and absorbs virtually no water. Plywood, in contrast, must be completely encapsulated in fiberglass to prevent waterlogging and rot.
Ultimately, though, they decided to err on the side of caution and glassed the bottom of the floor with 1708 fiberglass and polyester resin before installation.
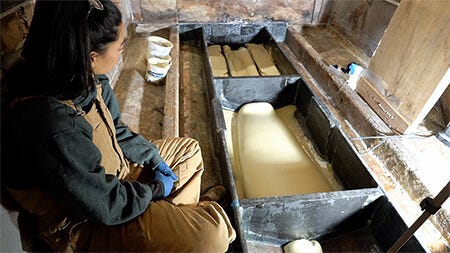
Danielle and Tommy used polyester resin thickened with glass fibers and fumed silica to about the consistency of peanut butter to bond the floor sections to the tops of the stringers and bulkheads.
They then weighted the floor down with cinder blocks while the resin cured.
Once the resin was cured, they used more thickened resin to fill any small gaps between the edges of the floor sections and the hull sides before tabbing the floor sections in place.
Tabbing the New Deck
“Tabbing,” means using relatively small pieces of fiberglass with resin to attach parts of the boat together. Typically, the parts being tabbed together meet at an approximately 90-degree angle. For example, stringers and transoms are commonly tabbed to hull bottoms, and decks are commonly tabbed to hull sides.
To tab the cabin sole of the SeaCamper to the inner hull sides, Danielle and Tommy used pieces of 1708 biaxial fiberglass that extended about 4” up the hull sides and 4” onto the sole. (They used individual “tabs” rather than a continuous strip of cloth only because they needed to leave several holes open through the floor to pour flotation foam later.)
Glassing the Floor
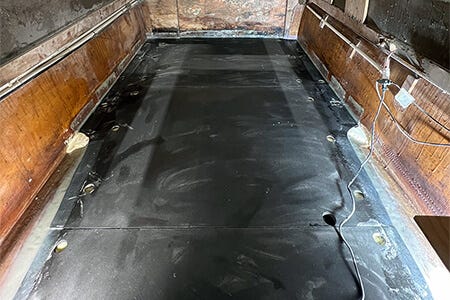
Once the floor sections were tabbed into place and the flotation foam was poured into the spaces under the floor and outboard of the stringers, it was time to put the first layer of glass on the floor.
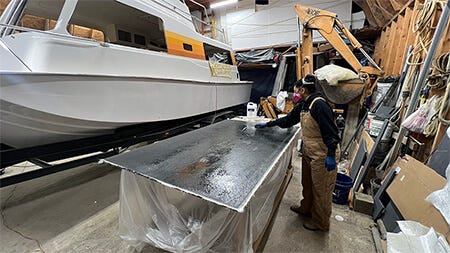
Danielle and Tommy chose 1708 biaxial cloth for this as well, cutting the glass so that it extended about 2” up the hull sides.
Because the 1708 material was 50” wide, several pieces were required.
They were careful not to let the “seams” between two pieces of glass fall in the same place as a seam between floor sections.
Instead, they overlapped the glass at the seams for added strength.
After the 1708 came a layer of chopped strand mat (CSM), which was also extended several inches up the hull sides.
The CSM was intended to help cover the pattern of the biaxial cloth as well as seams and overlaps, making fairing and finishing easier.
One of only a few things Danielle and Tommy say they would do differently is laying the CSM more carefully.
One of only a few things Danielle and Tommy say they would do differently is laying the CSM more carefully. The surface ended up less even and smooth than expected, resulting in lots of hours of sanding and fairing to achieve the result they wanted.
Next Steps
Eventually, the plan is to finish the cabin sole with gelcoat and nonskid. Danielle and Tommy considered several alternatives — marine vinyl flooring, peel and stick foam decking and marine carpet — but ultimately settled on traditional gelcoat and nonskid for toughness and easy maintenance. After all, if the SeaCamper goes even half the places they plan to take it, the cabin floor will be subjected to heat, cold, saltwater, freshwater, UV radiation, mud, sand and, of course, lots of dog claws along the way. Plus, they say, “We want to make this as much of a boat as we can.”
The gelcoat and nonskid won’t come for a while, though. First, Danielle and Tommy plan to design, build and install their cabinetry and other interior components. Because many of those pieces will actually be glassed to the floor, it doesn’t make sense to fully finish the floor until the rest of the interior is close to done and also ready for finishing.
Also coming up is the installation of several custom Boat Outfitters Starboard cabinets. Stay Tuned!

