
There is a special kind of ownership you feel when you have invested time and money into your “dream boat.” Whether the boat is brand new or an older vessel, and whether the time was spent up front researching and saving or spent later fixing and restoring, a boat properly earned gives a sense of satisfaction that extends far beyond the boat’s practical utility. Just being on a boat you’ve worked hard for brings a unique pride of ownership that can’t be measured in dollars.
If you’ve found your dream boat, you know that a mental wish list of upgrades or projects begins to develop very quickly — perhaps it’s a better shade system, an upgraded stereo, improved storage systems, or some other customization that makes the boat your own. At the very top of my list has always been the console switch panel.
Contents
A Highly Visible Eyesore
Back in 2000, when my Maverick Master Angler rolled out of the factory, it was a premium brand with all the bells and whistles. Everything on that boat has aged well with the glaring exception of the switch panel.
Not only was it an ugly, mismatched affair compared to the console it was mounted on, the switches themselves were cheap toggle switches that I found myself constantly replacing due to moisture intrusion and corrosion issues.
I’m not sure whether the off-white acrylic ever matched the oyster white gelcoat of my console, but dirt, grime, and eventually a chipped corner made it a highly visible eyesore that bugged me every time I was at the helm.
I knew from day one that, when I finally embarked on this project, I wanted something that was going to pop.
I’m pretty handy, but among all the other projects on my mental wish list, upgrading my switches and panel was forced to the bottom of my priority list based on the time, money, and perceived complexity of the project. I’d priced out pre-wired options, and they were both extremely expensive and, frankly, not much better looking than what I had. The console of a boat is a highly visible area, and the switch panel is the nerve center of the entire boat. I knew from day one that, when I finally embarked on this particular project, I wanted something that was going to pop.
Designing the New Switch Panel
Enter Boat Outfitters. Having recently upgraded my old under-gunwale carpeting with laser-etched foam padding, I knew that they could help me design what I was looking for. It only took a few more cheap toggle switches dying to finally get me to prioritize the project. After a little research on switch options, I started to develop a list of priorities.
Layout Changes
First of all, I needed a different layout, but I didn’t want to widen the cutout in my console. My current switch panel had a 12-volt outlet that I never used and that I’d found highly susceptible to corrosion.
On the other hand, I needed more switches than my current panel allowed for. Swapping out the outlet for another switch became a critical objective.
Improved Switches
Second, I wanted a higher quality, more functional switch. I was initially drawn to the clean, high-end look of the lighted push button switches, but decided against them for practical reasons.
I spend a fair amount of time on my poling platform, and getting down to turn off my navigation lights or live wells during early morning trips gets harder with age. I opted for the lighted Contua-style rocker switches that I could easily turn on or off with the butt of my fishing rod
Aesthetics
Finally, I wanted to extend the black and white scheme that matched the rest of my console, and I wanted to match the graphics that I had used on my under-gunwale foam padding.
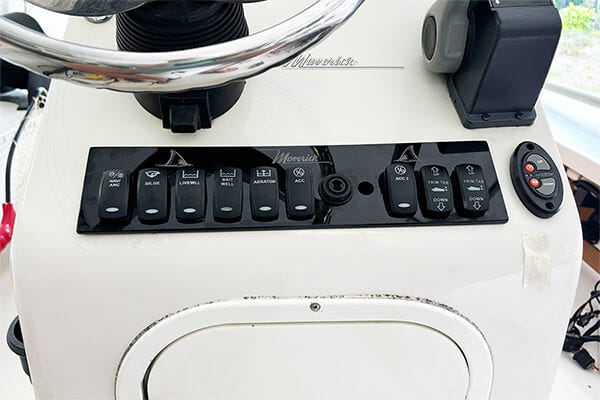
I decided to go with a high gloss, black acrylic material, with the Maverick logo engraved at the top. I knew from experience that the engineers at Boat Outfitters could help with this design.
I decided to go with a high gloss, black acrylic material, with the Maverick logo engraved at the top.
Spec’ing and Ordering the Switch Panel
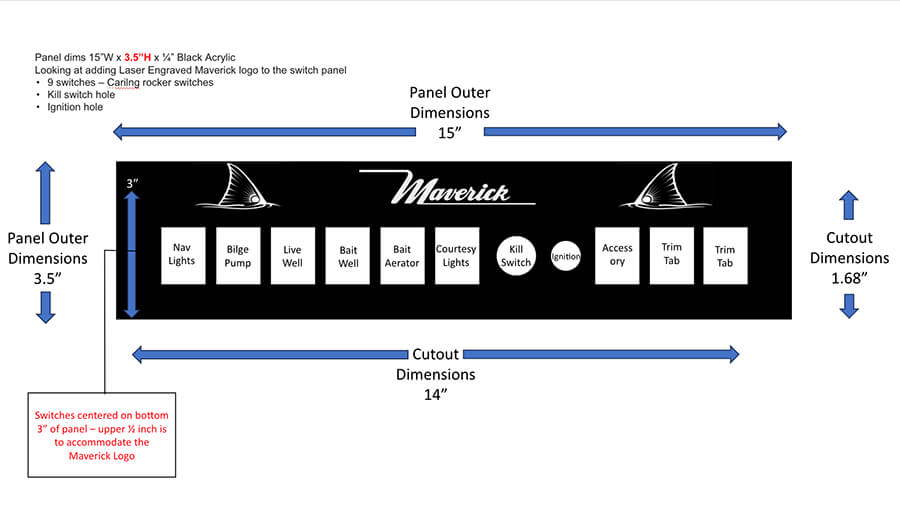
With those requirements, I reached out to Boat Outfitters. Although they only needed a rough sketch, I found it easier to use Microsoft PowerPoint® to mock up what I was looking for.
With my project manager’s help, I was able to get nine larger, high-quality switches into my panel, vs. the eight cheap toggle switches I had before.
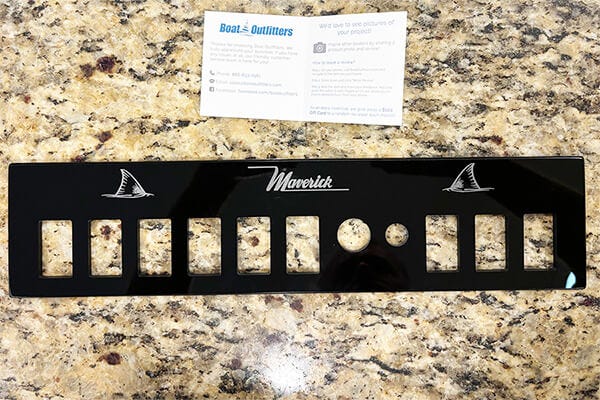
Isn't She Pretty?
By extending the height of the panel, I was also able to get the Maverick Logo and redfish tail design over the switches.
I emailed the design to my project manager, and after a few discussions with the engineer, he came back with some recommendations to make it look even better.
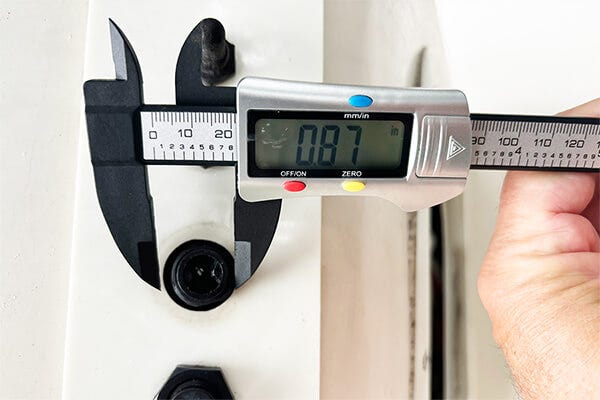
We double-checked all of the measurements, and once confirmed, the project went to production. A week later, I had a package waiting at my door.
Wiring the New Switch Panel
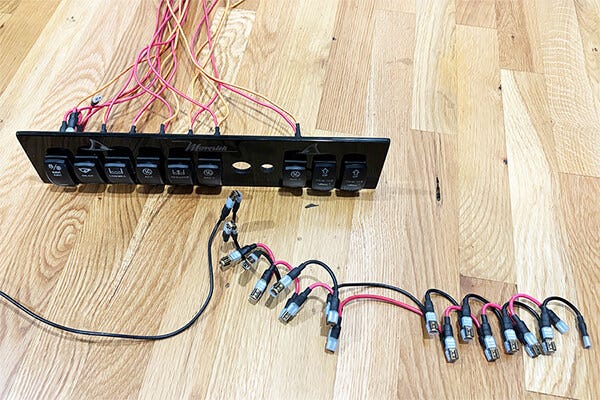
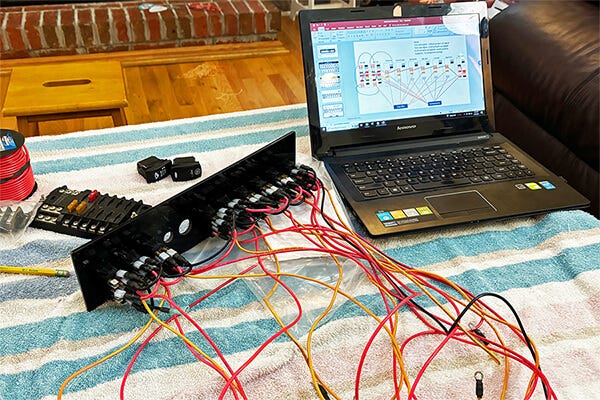
Thanks to Boat Outfitters’ help, designing the panel itself was the simplest part of the project. Now I had to install — and wire — all of the new switches. Unlike my cheap but simple toggle switches, the new switches had more terminals to power the LED lighting.
At first, I was a bit overwhelmed by the wiring, but thanks to YouTube, I began to understand the pattern required for the additional switch terminals, and with the exception of the trim tabs, all of the other wiring was simply a matter of matching what I already had.
With this basic knowledge, I purchased 14 gauge tinned wire and plenty of marine-grade heat shrink connectors and got to work.
I was a bit overwhelmed by the wiring, but thanks to YouTube, I began to understand the pattern required for the additional switch terminals.
Understanding the Basics of Lighted Contura Switches
The first key to figuring out how to wire the lighted Contura switches boiled down to understanding the basic pattern of the terminals (tabs) on the back of the switch. For most of these switches, the pattern is consistent, regardless of how many positions the switch has.
As a general rule, when looking at the switch from the back, the upper righthand terminal is the negative wire that powers the LED light. The upper left terminal is the positive for the lights. Eliminating those two terminals from the equation immediately simplifies the rest of the switch. All of the other terminals are geared towards driving the actual components of the boat — whether lights, pumps, or other accessories.
Wiring Power to the Switches
The second key is understanding that power goes into the center terminal of the switch — and for most switch styles, this terminal is on the left side (again looking at the switch from the back).
Power comes in from the fuse block and connects to this terminal. That leaves the remaining terminals for the power out to the components.
For simple items, such as livewell pumps, there is only one terminal left, and that terminal is connected to the wire that runs to that pump. Navigation lights get more complicated, since the switches have three positions (anchor light, off, anchor and bow lights). These require some jumper wires and the configurations for these required a bit of research to get it right.
Navigation light switches require some jumper wires and the configurations for these required a bit of research to get it right.
The trim tab switches turned out to be much more complicated. With two independent LED lights, these switches had ten terminals on the back, and required multiple jumper wires. It took me three attempts, but I finally managed to untangle the wiring diagrams and get the tabs working properly.
Installing the New Panel
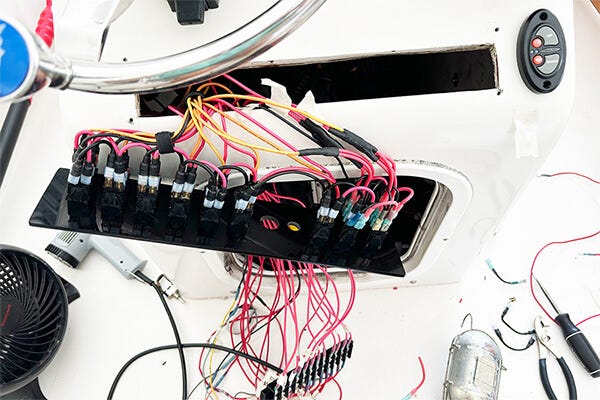
With the switches snapped into the panel, and all of the wiring completed, the final installation required three more steps:
- Connect the “power-in” wires to my fuse block and the “power out” wires to the various components of the boat
- Drill, seal, and screw the panel to the console.
- Clean up and organize the wiring.
For the first step, I used heat shrink solder connectors to keep out corrosion and ensure a good electrical connection. Thanks to a previous rewiring of the entire boat, all of my wires were well labeled for both power in and power out connections.
The second step, mounting the panel to the console, required a special drill bit for acrylic that Boat Outfitters offers. The bit has a sharper point than conventional drill bits and will not chip or crack the acrylic panel. If you take on this project, make sure you use these specialized bits.
Mounting the panel to the console required a special drill bit for acrylic. If you take on this project, make sure you use these specialized bits.
Once the holes were drilled, but before screwing the panel to the console, I applied a thin bead of clear sealant to the inside edges of the panel. For this step, I placed painter’s tape around the outside of the panel to keep the sealant from extending past the panel and onto the console. While relatively invisible initially, even clear sealant will eventually attract grime and ruin the clean look of the new panel. Once the sealant was applied, I screwed the panel to the console, wiped away any excess sealant that was squeezed out, then removed the painter’s tape.
Cleaning Up the Console Wiring
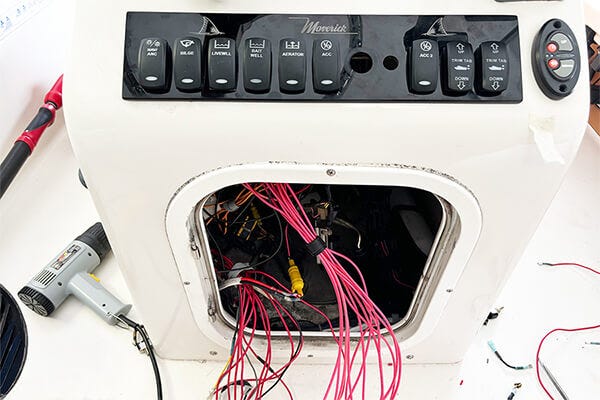
The final step of the installation was to clean up the wiring under the console.
In the past, I’d used a combination of electrical tape and zip ties for this job, but I’ve learned over the years how often I find myself digging back through that wiring and having to cut and then re-tie all of that wiring.
I’ve learned over the years how often I find myself digging back through wiring and having to cut and then reinstall all of those cable ties.
A few years ago, I stumbled onto a much better solution: hook-and-loop cable ties, which have proven to be both durable and incredibly convenient. Not only are they easy to use initially, but when the need arises to add, remove, or isolate wiring, they make it easy to keep the rest of your wiring organized while you work.
The Journey to a Better Console
While I’ve learned, by necessity, to be pretty handy around boats, wiring and electrical projects are not my forte. It took six years and numerous cheap toggle switch replacements to finally get me to address the ugly switch panel I had been living with. However, like many other projects I’ve embarked on, I realized quickly that the job was far simpler than I thought it would be.
Between the great support from my Boat Outfitters project manager and the infinite number of YouTube videos about wiring switches, I was able to swap out my old, outdated switch panel with a new one in less than a day.
Not only did I walk away with a much better looking and much more functional console, I also learned the “guts” of my boat in a way that instilled a greater sense of confidence in it.
Not only did I walk away with a better looking and more functional console, I also learned the “guts” of my boat in a way that instilled a greater sense of confidence in it.
Keeping pumps running, lights lit, and electrical components working in a marine environment is a never-ending war. Knowing what wire goes where and how it all works gives me a significant advantage in battles ahead.


