Ready-to-Roll DIY Non-Skid Options
June 20, 2023 7 min read

Is your non-skid worn slick or hopelessly stained from years of use? Are you replacing your fuel tank, repairing soft spots, removing accessories, or doing other repairs that require patching your deck? Do you just want to refresh your boat with a new deck color or fresh surface? Whatever the case, it’s going to mean re-doing some or all of your non-skid, and there are more options than you might think.
Contents
The Professional Route
If you’re not concerned about how much it costs or how long it takes, the easiest and best option is to have it sprayed professionally by a reputable shop with two-part marine paint and a non-skid additive. For aesthetics and ease of cleaning, there’s really nothing that compares with expertly applied Awlgrip or similar polyurethane topcoat paint combined with polymer particles. The drawbacks are simple: it’s expensive and, depending on how busy the shop is, it can take a while.
Another route is to apply a peel-and-stick foam decking product. Like spraying, though, this isn’t really a DIY job except for fairly small areas. Even if your boat model has already been “templated” by a foam decking installer or manufacturer, getting a good installation on your first attempt isn’t likely. Positioning and applying foam decking — even when it’s pre-cut — takes practice. The drawbacks to having foam decking professionally installed on most or all of your boat are the same as those of having non-skid professionally sprayed: it’s expensive, and good installers are often backed up.
The DIY Alternative
As far as DIY options for re-doing non-skid, the scope of the job is a big consideration. For small areas, stick-on products are a good choice. For example, if the non-skid where you stand at the helm is worn slick, a peel-and-stick foam helm pad is easy, inexpensive and effective.
Likewise, if you need to improve traction on ladder treads, a casting platform, or another smaller surface, you can go with foam or even traction tape, like that made by Gator Grip. Self-adhesive non-skid products also work well to cover smaller patches without having to match existing non-skid nor re-do the non-skid on the whole boat.
For larger areas, you’ll want a roll-on product. Polyurethane topside paints can be rolled on instead of sprayed. With most, you can either “sprinkle” non-skid additive onto wet paint and then cover it with a second coat, or you can mix the additive into the paint before rolling.

Don’t expect the result to look as good as a professional spray application, but if you’re patient and follow directions, you can get close and still have an exceptionally stain-resistant and easy-to-clean deck. The main drawback to this approach is that it’s labor-intensive and “finicky,” with lots of prep work, priming, mixing, thinning, sanding between coats, etc.
One-Part, Roll-On Options
That leaves ready-to-roll non-skid products, which have a lot going for them. Comparatively, they’re fairly inexpensive, easy to apply and require less prep than other options.
There are several different types of these roll-on non-skid formulations, each with its own unique advantages and disadvantages. What they all have in common is that they are one-part, water-based, non-toxic products and ready to apply right out of the can with no specialized equipment aside from product-specific roller covers.
Let’s take a look at two of the most popular, Tuff Coat and KiwiGrip.

Tuff Coat
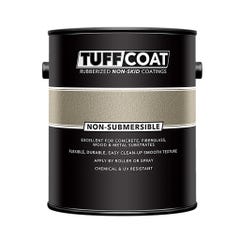
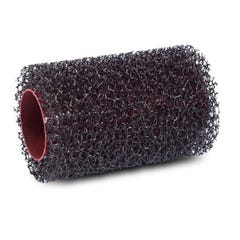
Tuff Coat is a thick, flexible coating containing recycled rubber granules for texture. It is made in both submersible and non-submersible versions, each of which is available in a range of pre-mixed colors — 15 for the submersible UT-200 and 19 for the non-submersible UT-100. If rolled on, a special Tuff Coat roller must be used.
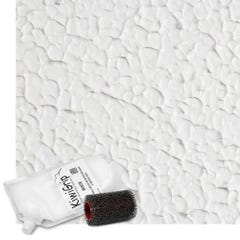
KiwiGrip
KiwiGrip, on the other hand, contains no granules or grit of any kind. Instead, it gets its non-skid properties entirely from the “peaks” formed when it is applied with the required roller.
It is available in five pre-mixed colors but can be tinted in virtually any color with common water-based tints. Both are thick, permanently flexible coatings. That gives them the unique ability to fill and cover imperfections like spider cracks and even small screw holes. And because they’re permanently flexible, they don’t crack themselves in the way gelcoat and other more rigid coatings can.

On the other hand, those same qualities make both coatings very difficult to remove. They soften with heat, meaning they’ll just gum up sandpaper. Removal by grinding or scraping is possible but not fun.
Prep and Application
Both KiwiGrip and Tuff Coat are easy to apply relative to most other marine coatings. Neither requires that existing gelcoat or paint be completely removed. As long as the paint or gel is sound, it needs only to be completely cleaned, degreased, and scuffed with coarse sandpaper to create a profile.
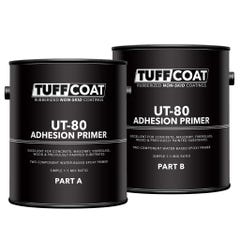
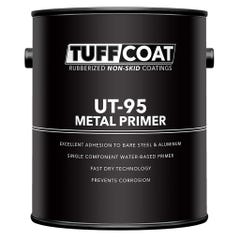
Tuff Coat requires a special, two-part Tuff Coat-branded primer. There’s a different primer for bare metal. The primer needs to cure for several hours before the coating is applied. KiwiGrip doesn’t require a primer if applied over scuffed gelcoat or paint, but the manufacturer notes that KiwiGrip does not seal water out of the substrate. In other words, you need to apply an epoxy primer to anything that isn’t waterproof, including bare fiberglass, wood, metal and concrete.
Tuff Coat emphasizes the need to thoroughly mixpix the product with a paddle wheel on a drill to make sure the rubber particles are evenly distributed. KiwiGrip should also be mixed, but because it is “homogenous” without any suspended material, there’s no risk of inconsistent texture.
A single coat of KiwiGrip is typically sufficient, while Tuff Coat recommends a minimum of two coats.
A single coat of KiwiGrip is typically sufficient (unless more is needed to hide a dark-color substrate), while Tuff Coat recommends a minimum of two coats. Tuff Coat can be rolled on from a normal roller tray, like interior paint. KiwiGrip, which has a thicker consistency, is spread directly onto the surface from the container using a notched trowel or a large paintbrush. Then it is rolled to evenly distribute the product and create the texture.
KiwiGrip begins to cure quickly, and the hotter the weather, the faster it cures. The company recommends having two people for application: one to spread the product with a trowel and a second to roll the product. While the second is rolling, the first pulls up any masking tape from the last section rolled.
Finished Texture
The only way to fully understand the texture difference between these two products — or any non-skid — is to feel it in person. Also, remember that the final texture varies with substrate and application technique.
That being said, Tuff Coat generally provides a more aggressive looking and feeling finish. Its rubber particles also give it a small but perceptible elasticity underfoot. Boat owners who have applied Tuff Coat often compare it to a spray-on truck bed liner — tough and utilitarian with a bumpy, matte finish and grip to spare.
Boat owners who have applied Tuff Coat often compare it to a spray-on truck bed liner — tough and utilitarian with a bumpy, matte finish.

KiwiGrip more closely resembles the rolled gelcoat nonskid found on many boats. It has a more uniform, less aggressive appearance and texture and generally provides somewhat less grip.
Keep in mind, though, that the texture of and grippiness of KiwiGrip can be adjusted during application. Thicker applications yield a more aggressive texture and a longer lifespan, while thinner applications are more comfortable on bare feet and easier to clean.

Color Choices
The submersible formulation of Tuff Coat comes in 15 colors, the non-submersible version in 19. Many of those are not colors you’d normally associate with the deck of a recreational boat — safety orange, black, olive, dark brown, etc. — but there are half a dozen or so whites, grays, beiges, tans and blues that are well suited for non-skid on most boats.

KiwiGrip, on the other hand, is sold in only five colors: white, a very light blue, cream, light gray and black. On the other hand, KiwiGrip can be readily tinted with common water-based tints to achieve almost any color you want.
Cleaning
The fact is that neither of these products is as easy to keep clean as a two-part polyurethane topside paint. Both are similar to gelcoat in their stain resistance and the amount of elbow grease required to clean up spills and everyday grime. Simply by nature of its more aggressive texture, Tuff Coat is a bit harder to clean up in a typical application. Again, though, the actual texture of either product depends to a large degree on how it is applied.
Both Tuff Coat and KiwiGrip are tough, long-lasting coatings.
Both Tuff Coat and KiwiGrip are tough, long-lasting coatings. Expect a similar lifespan to that of gelcoat nonskid.
Cost
Directly comparing cost is difficult, since it depends on several factors, including how many coats you’re applying and whether you’re using primer. If you’re applying over an existing, sound gelcoat finish, KiwiGrip is significantly less expensive, since no primer is required and only a single coat is recommended.
If a primer is required for the KiwiGrip, total cost is closer, depending on your choice of primer (Tuff Coat non-skid should only be used with Tuff Coat primer). Both products will be far less per square foot than either custom-cut foam decking or two-part topside paint combined with a grip additive.