What to Know When Ordering 'Build Your Own' Parts
August 17, 2023 8 min read

Boat Outfitters offers off-the-shelf solutions that meet many boat owners’ needs, but when you need to maximize space or adjust the dimensions, the customizable doors, hatches, glove boxes, fillet tables, helm risers, drawer units and more in our “Build Your Own” section can ensure you get exactly the right solution for your specific application. Many of the “Featured Project” articles in the Learn section of our website feature examples of customers who took advantage of this option, and the results were impressive enough that many have used it time and again.
With Build-Your-Own parts, we depend almost entirely on customers to provide accurate specifications. Every project is slightly different, and the reality of providing solutions for such a wide range of applications is that small details can make a big difference in fit, function and form. This article will help you avoid some of the most common spec’ing and ordering mistakes that customers make and ensure that your project goes smoothly.
Contents
- 1. Two Rules that Can Prevent 90 Percent of Mistakes
- 1.1 Pay Attention to the Red Warning Boxes
- 1.2 When in Doubt, Contact Us
- 2. Door Sag
- 3. About Bulb Seals and Water Resistance
- 4. Dimensions Explained
- 4.1 Hole Cutout Dimensions
- 4.2 Interior Dimensions
- 4.3 Outside Dimensions
- 4.4 Pass-Through Dimensions
- 4.5 Receiving Material Thickness
- 4.6 Frame Thickness
- 4.7 Opening Clearance
- 5. Radius Corners
- 5.1 Cutout Shape
- 5.2 Existing Cutout with Square Corners
- 5.3 Smaller Opening Size
- 6. Color Choices
- 7. Hatch Flex
- 8. Mounting Styles
- 8.1 Face Mounting
- 8.2 Inset Mounting
- 9. Powder Coating
- 10. Working With Boat Outfitters
Two Rules that Can Prevent 90 Percent of Mistakes
Let’s start with two general rules that will make the biggest difference in your ultimate satisfaction with your project. Follow these, and you can avoid many of the potential mistakes outlined later in the article.
1. Pay Attention to the Red Warning Boxes
Over the years, we’ve identified common mistakes, and we’ve worked to build our website logic to warn customers when something might not work the way they want it to. Starboard is a great material for many applications but, like any other material, it has limitations that can impact the fit, function, or aesthetics of your upgrade.
We’ve set thresholds in our calculators that will trigger red warning boxes when your dimensions or other selections may present an issue.
Many of the issues we see where a project did not work as intended are the result of customers overlooking or ignoring these warning boxes.


2. When in Doubt, Contact Us
The very nature of our business is details, and we are staffed and equipped to get “into the weeds” on our customers’ projects. When you call us, you’ll speak with a trained expert ready to discuss dimensions, material considerations, mounting requirements, etc.
We always encourage customers to call before placing an order for a Build-Your-Own part (or anything else, for that matter) if there is any question about fit, functionality or the appropriateness of a material.
A quick phone call can save days or weeks of aggravation and potentially a significant amount of money.

In addition to following these two general rules, being aware of several other factors can help you spec and order a part that will fit and function exactly as you intend.
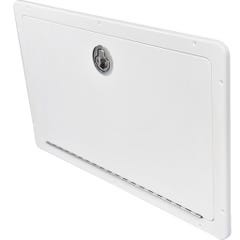
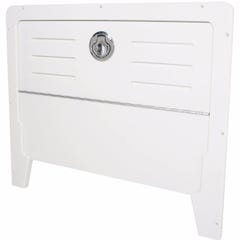
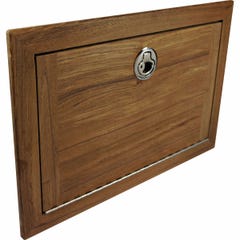
Door Sag
Because Starboard has some inherent flex, Starboard doors mounted in vertical surfaces with hinges on the side can “sag” in their frames. In smaller doors (less than 24” wide as a rule of thumb), sag is rarely noticeable. In larger doors, even a small amount of sag can make the door look uneven in the frame when closed and potentially contact the bottom of the frame.
Here are some tips to avoid a sagging door:
- Call us before ordering a Starboard door over 24” wide. Regardless of hinge location, we advise customers to call us to discuss larger doors. They can work, but there are more factors to consider including overall door size, number and location of hinges, number and location of latches, and frame material.
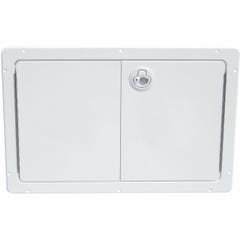
- Side-hinge doors shouldn’t be wider than they are tall. Except for very small doors, if you need a door for an opening wider than it is tall, you have two options:
- Locate the hinges on the top or bottom instead of the side.
- Use a double door to span the opening. Each panel of the double door should be taller than it is wide.
- Consider an aluminum-framed door. A side-hinge Starboard door will sag less in an aluminum frame than in a Starboard frame since the aluminum is much stiffer.
- Consider an acrylic door panel. Acrylic is more expensive and not as tough as Starboard, but it’s significantly more rigid. That makes it a popular choice for larger doors such as console entry doors.
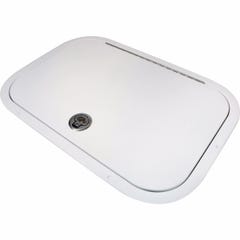
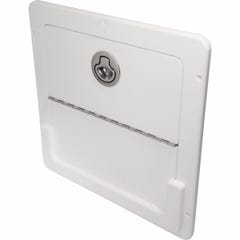
About Bulb Seals and Water Resistance
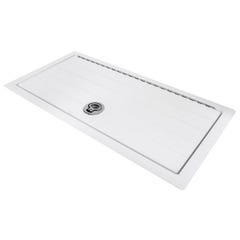
Many Build-Your-Own parts can be ordered with or without a rubber bulb seal. Customers are often surprised to learn that bulb seals on doors and hatches do not make them watertight. Yes, they’re more water resistant than doors and hatches without seals, but you should never depend on them to keep the contents dry. Instead, the main purpose of a bulb seal is to prevent play and reduce noise.
Deck hatches in particular are vulnerable to water intrusion. Because the frame design has a lip that is recessed below the deck, even if the bulb seal keeps the water out, it pools in the frame and drains into the hatch as soon as it is opened. These hatches often allow some seepage even when the hatch is closed, especially with square-cornered hatches.
These hatches often allow some seepage even when the hatch is closed.
Also, be aware that a bulb seal can cause a large (>24” wide) Starboard door to flex. The door may compress the bulb seal along the hinge side, but, at the farthest corners, where it has the least support, the door may not be able to completely compress the seal and may even appear to be warped or pulling away from the frame.
These areas where the door panel doesn’t press as hard against the seal are also especially vulnerable to water intrusion.

For door and hatch panels between 24” and 40” from the hinge side to the latch side, this can be addressed by simply using two latches. Beyond 40”, you will notice a warning that recommends discussing your plans with a project manager to ensure you end up with the best solution.
If the final size of the opening in your door, hatch or box is critical, note that adding a bulb seal will make the opening slightly smaller — 1/4” in each dimension. Finally, although they are still not intended to keep water completely out, bulb seals form a better seal when used with acrylic doors, which are significantly more rigid than Starboard doors.
Dimensions Explained
The most critical thing to start your project off on the right foot is to ensure your measurements are correct. While that may sound obvious, the number of dimensions you need to consider can quickly add to the complexity of a design.
Hole Cutout Dimensions
For doors, hatches and recessed storage units, the single most critical dimensions are those of the cutout itself — the hole the part fits into.
Whether you have an existing cutout or will be making a new one, measure carefully and precisely.
Our parts are made to the 16th of an inch. Note that this is a different measurement than the pass-through dimensions, discussed below.

Interior Dimensions
For recessed storage units and other parts that protrude behind the mounting surface, it is extremely important to thoroughly inspect and measure the area behind the mounting surface. Measure the available depth, taking into account any wiring, bracing, plumbing or hardware.
Outside Dimensions
This refers to the total distance from one frame edge to the other. Outside dimensions will be larger than cutout dimensions and must be carefully considered. Even if you have room to make the required cutout, you may not have room for the frame. Pay attention not just to obstacles but also to curves or other features in the mounting surface, ensuring that you have a large enough flat area.
Pass-Through Dimensions
The pass-through or clearance dimensions represent the maximum size of the final opening after the door and frame are installed. Because frames have a lip that the door or hatch sits against, the pass-through will be somewhat smaller than the cutout. Note that adding a bulb seal makes this lip slightly wider — 1/4” vs. 1/8”. Pass-through dimensions are particularly important for applications such as tackle stations, where the size of the final opening may have to accommodate specific items, such as tackle trays.
Note that adding a bulb seal makes this lip slightly wider.
Receiving Material Thickness
The thickness of the material you are mounting your part to is also an important factor. This may impact your choice of mounting hardware as well as your choice of frame material. Aluminum frames are best suited to mounting surfaces at least 1/2” thick. They can be mounted in thinner materials, but extra steps are required.
Frame Thickness
When designing your project, you may need to consider the thickness of the frame itself, especially when clearance is limited. Starboard frames protrude more than aluminum frames (1/2” vs. 1/8”), which can make a difference in tight, high-traffic areas, such as between the console and gunwale.
Opening Clearance
With all this measuring, customers often forget a final (and very important) measurement — whether the door or hatch has enough room to swing open and allow reasonable access.
-
- If you’re mounting a part in a confined space — on the aft face of the console, for example, where the doors could hit the leaning post — be sure you have sufficient clearance. If it’s close, make a mockup of the door with cardboard. If clearance is a problem, consider double doors, folding lift-out doors, or a removable door.
Radius Corners
Our aluminum-framed doors and hatches with radius (rounded) corners are popular because they tend to work better aesthetically on most boats than our square-corner hatches. Measuring for a radius-corner door or hatch requires some special considerations, though, especially if you’re trying to fit it into an existing cutout with square corners.


Cutout Shape
When considering a deck hatch with radius corners, it is important to remember that these hatches require a cutout with curved corners that match the same radius. The corners should have a radius of 1-7/8”. A cutout with square corners will result in gaps that are not covered by the curved corners of the deck hatch frame. If you are planning a project that uses one of these hatches, make sure you use the radius corner template tool on our website to determine the proper cutout shape.
These hatches require a cutout with curved corners that match the same radius.
Existing Cutout with Square Corners
If you have an existing cutout with square corners, you will need to enlarge it by 1-1/8” in each dimension with a 1-7/8” radius at each corner. See the detailed instructions on our website and use the radius template tool to draw the shape. These measurements can be confusing; some customers find it helpful to make a cardboard mockup to test fit.
Smaller Opening Size
Keep in mind that the radius corners cannot be adjusted and are determined by the dimensions of your opening. With any hatch or door, the frame will result in a pass-through size slightly smaller than your hole cutout dimensions. A hatch or door with radius corners will reduce that area even more.
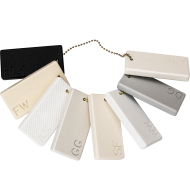
Color Choices
Generally speaking, our Build-Your-Own Starboard parts are available in a variety of whites, off-whites, grays, browns and black. There are some caveats and special considerations, though.
- Don’t trust your screen. If an exact color match is important to you, we strongly recommend ordering a sample chain of Starboard colors. Computer monitors and phones just can’t give you an accurate representation.
- Seafoam isn’t what you think. “Seafoam” generally refers to a light blue-green. Not so with Starboard. When referring to Starboard, Seafoam is an off-white or buff color.
- Black Starboard shows scratches and scuffs. We usually advise against black Starboard for door and hatch panels, since even small scratches and scuffs tend to show.
- Aluminum-frame parts are available in fewer colors. Aluminum frames can be powder-coated in White/White, Arctic White, Seafoam, Dolphin Gray and Black. If you want another color part, you’ll need to choose a Starboard frame.
- Acrylic is also available in fewer colors. Generally, acrylic doors and hatches are offered only in White/White, Arctic White, Seafoam and Black.
Not sure about color?
We offer a wide array of colors to match the most common boat gel coats and marine colors schemes. Explore the color options and guarantee a perfect match with a sample chain.
Hatch Flex
When used for deck hatches, Starboard will flex slightly underfoot.
The larger the hatch, the more apparent the flex. Starboard is extremely strong, so failure is not a concern, but if you simply don’t want to feel the flex, consider adding an aluminum stiffener to the underside of the hatch.

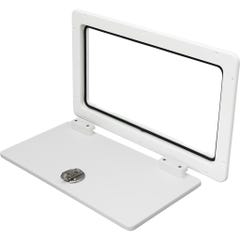
Mounting Styles
There are two choices of mounting style for most doors, hatches and recessed storage units. Each has its own pros and cons.
1. Face Mounting
Face mounting means simply screwing or bolting the part to the mounting surface through holes in the frame. It is the easier of the two methods but leaves the heads of your fasteners visible. Through-bolting is always preferred, but self-tapping screws are sufficient in most cases. All Starboard-framed parts are face-mounted.
2. Inset Mounting
With inset mounting, screws are inserted through holes in the inside flange of the frame and into the exposed edges of the mounting material. With mounting surfaces less than 1/2” thick, additional “mounting strips” must be fabricated from wood or Starboard to “build up” the mounting surface and give the mounting screws something to bite into. Inset mounting is more involved, even with a thick mounting surface, but provides a cleaner appearance with no visible screw heads. Inset mounting can only be done with aluminum-frame parts.


Powder Coating
Powder-coated aluminum looks great and is easy to clean and maintain.
As most saltwater boaters know, though, a ding in the coating that allows saltwater to reach the aluminum underneath will result in “bubbling” — corrosion of the aluminum substrate that looks like bubbles under the coating.
In most applications, this isn’t a significant concern; powder coating is tough and won’t ding from normal use. But for applications where the frame of a part will be exposed to frequent or sustained contact with metal objects — anchor lockers are the perfect example — we don’t recommend aluminum frames as it’s simply a matter of time until they get dinged by the anchor or chain.

Working With Boat Outfitters
At Boat Outfitters, our primary goal is to ensure that, whatever your project, you end up with a solution that maximizes functionality and aesthetics of your design. We’ve helped many customers over the years and worked with them through all of the various challenges that their projects presented. Throughout that time, we’ve learned a lot with our customers, and we have developed our website to help future customers avoid some of the most common mistakes we’ve seen.
Every project is different, and we have a team of project managers who are always happy to discuss your project and help you think through potential challenges, so that the final design results in the right solution. While many of our products are “off-the-shelf” and ready to go, whenever you have a question about the fit or functionality of one of our products, give us a call. A few minutes with a project manager can save you both money and time and ensure that your installation goes smoothly.